3-D Tools to Help Visualize a Master Bath Remodel
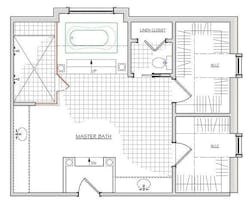
Our subject this month is a master bathroom. And oh what a bathroom it is! The existing bath has a separate tub and shower, an enclosed toilet area, two large vanities, and what feels like acres of floor space. We believe that all of our clients understand three-dimensional views much better than two-dimensional plans and elevations. As a result, we work hard to supplement preliminary plans with 3-D models of the spaces we design. This month I’ll show you examples of what we typically present to clients.
Too Much Space
At the top of the client’s wish list: Find a good use for all of the extra space. But the existing bathroom has other, less-than-ideal, features to consider as well. The bathroom is two risers down from the bedroom. While this adds ceiling height, it’s also something of a nuisance. Another issue is that users must climb three risers to step into the tub. This looks grand but feels awkward, and you have to go through the bathroom to get to the closets—an option that some people like but others don’t.
Modeling the Remodel
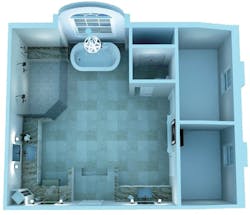
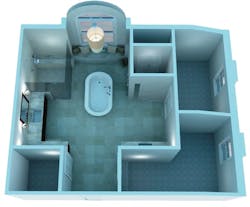
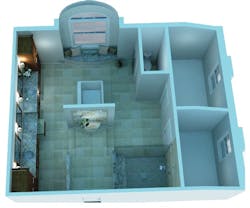
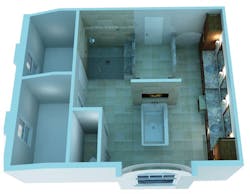
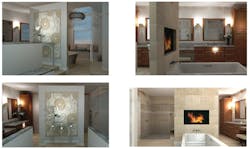
Once we have some ideas down on paper, we take them to our designer to make them shine. She’s a genius with finishes and 3-D renderings. The models at right show a few of our big-picture design concepts for this bathroom.
We removed the throne-like tub and with it the three steps needed to reach it, but the client wasn’t concerned about the steps down into the bathroom itself, so they remain in all options. However, we are looking for a more graceful way to incorporate them. One option (A) replaces the existing railing and newels with extended countertops on either side of the door.
We also tried to find a way to access closet space without requiring walking through the bathroom. One early idea was to incorporate interior closet doors into the entry (B).
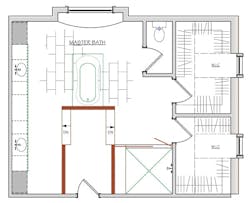
Four-Way Split
This option reorganizes the space. The step down on either side of the tub divides the extra space in half, left and right, which provides more direct access to the closets.
The monolithic wall beyond the steps divides the space crosswise. This creates privacy from the entry and directs attention at the tub to the large window and the fireplace. It also cleans up the window wall and brings the vanities and sinks together.
Finishing Touches
Talk about building excitement! How can any client say no after seeing these images? The 3-D renderings convey the design intent and “feel” of the space in a way that plans and elevations just can’t match.
I’m curious: How do your presentations stack up? How long do they take to create? When you’re competing against another company for a project, are your drawings helping you make the sale?
Want to know more about the software used to create these renderings or to show me some of your own 3-D images? Send me an email at [email protected].
And read my follow-up article, "Software for Visual Presentation," where I reveal how we create our 3-D renderings at Case Design/Remodeling.
---
Bill Millholland is an executive vice president at Case Design/Remodeling, in Bethesda, Md.

