For years—decades, really—the entire building science community has been working to improve the way we build and remodel. Everyone has been testing and publishing and lecturing … and yet there is still so much resistance to building things right. Why is that?
We think it’s partly because people are busy, change takes time, and time is precious. The architect is too busy to redraw the section; the contractor doesn’t know what’s missing; the crew can’t install it correctly without instructions; and instructions are boring, or poorly written, or both.
How to Finish a Basement
So here’s the solution: At Otogawa-Anschel Design+Build we’ve picked five house components that every remodeler has to mess with, and we’re going to cover them in a series of articles in this section. For each one, we’re collaborating with Professional Remodeler’s editors to provide detailed drawings, the dos and don’ts behind those details, plus online videos and animations that walk you step-by-step through proper installation. What you gain is everything you need to get the job done right; what you lose are your excuses for doing it the wrong way.
RELATED: Six Tips for Basement Renovation
Basements Are Wet
Let’s start with the basement. Unless it’s built like a boat, with proper exterior waterproofing and radon control systems in place, a basement is a dangerous space to finish. The ground around a basement is almost always wet, and the walls and concrete slab are porous; CMUs and mortar joints are super-porous. A basement may look dry, but that’s because the walls and floor are being heated, converting liquid water into vapor, which is pulled into the air. As soon as you cover up those surfaces and insulate, which restricts air flow and moves the condensation point to the interior surface of the foundation wall, you’ll have wet walls and floors.
A basement should be built like a boat to keep water out. But most houses are built on porous walls and floors with nothing between the wet and the dry. In a house that is built like a sieve, if you want finish materials in the basement, you first have to manage the moisture in the walls and floor. To be successful, there are a few simple things you absolutely must do, and a few you absolutely must avoid.
Here’s a list of Dos and Don’ts, plus some illustrations that show everything you need.
Drainage
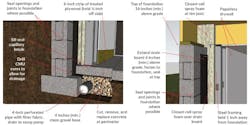
DO install a drain-tile system with a sump pump that discharges any water within a minimum of 5 feet from the foundation.
DO extend interior drain board from the drain tile up to at least 6 inches above grade. Best is a dimpled sheathing such as Cosella-Dorken's Delta-Dry.
Walls
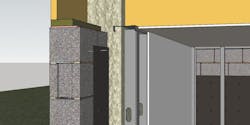
DO frame with steel studs set on a capillary break, such as a sill seal (this also helps with uneven floors).
DO hold framing 1 inch away from the foundation walls—no exceptions!
DO spray high-density polyurethane foam 2 to 3 inches thick behind the stud wall and all the way up onto the rim joist. If you choose to use batt insulation, don’t let it touch the foundation walls.
DO install paperless drywall, such as DensGlass, and hold it ½ inch off the floor.
DON’T let the wall framing touch the walls or the floor (treated lumber wicks water).
Floor
DO use moisture-resistant flooring, such as ceramic tile or vinyl composition tile. If you want the look of wood, cover the slab with a vapor-control layer with taped seams and install a glued or dry-fit engineered click-lock floating floor system.
DON’T install carpet.
For a PDF and animated version of this detail, see “Details for Warm and Dry Basement Living Space” at protradecraft.com.
---
Michael Anschel is president of Otogawa-Anschel Design + Build, in Minneapolis, and a founding board member of Greenstar.

