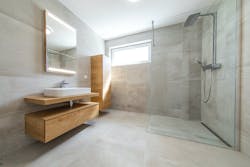
Curbless showers not only enhance a bathroom’s aesthetic, but they also prep the home for aging, unforeseen disabilities, and injury. Although installing a curbless shower is relatively straightforward after a few installation runs, there are still design choices remodelers must consider with each unique renovation. Here are three topics remodelers should consider to tailor the curbless shower to each clients’ needs.
Mortar bed versus pre-made pans for a curbless shower
Choosing between a mud bed and a pre-made pan for the curbless shower base comes down to personal preference. Issac Ostrom, a remodeler who runs the popular YouTube channel Tile Coach, prefers mortar beds for curbless showers due to their customization. “I like this [mortar bed] way better than a foam pan,” Ostrom, who has over two decades of experience in construction, says in his video tutorial on curbless showers. “We hit the slope wherever we want it and everything just fits in there really nice.” By floating dry-packed mortar, Ostrom created a one-inch slope at a quarter-inch-per-foot to serve as a base for the curbless shower.
Dry-packed mortar bed may give remodelers more control over the slope, but a mortar-based method requires extra work and time as remodelers must hand-pack the slope and ensure it is level. It takes Ostrom, a seasoned remodeler, 15-20 minutes to pack a small shower with deck mud. If your project requires a unique slope or shape, a dry-packed, deck mud mortar bed may be the way to go, but there are custom options for some pre-made pans.
Meanwhile, others prefer pre-made pans. For example, Eric Anderson, president of DreamMaker Bath & Kitchen of East Georgia in Swainsboro, Georgia, uses the KBRS Tile-Basin shower pan. “It comes pre-sloped, and it’s completely leak-proof from the start,” Eric Anderson, president of DreamMaker Bath & Kitchen of East Georgia in Swainsboro, Georgia, told Pro Remodeler for a Pro’s Pick. “Frame the walls around it, place thinset, set it down, connect it to a standard drain for tiled showers, and it’ll be 100% leak-proof.” If efficiency is the name of your game, a pre-sloped pan might be best.
Want to make your curbless shower memorable? Try bringing it outside or adding a view to nature to enhance its biophilic potential.
Pick the right tile size and shape for your curbless shower
Although there are some constraints in tile choice in that they must be able to accommodate the slope, remodelers are not limited in tile size as a whole when constructing curbless showers. Small tiles—square, rounded, herringbone, etc.—can easily be used with a center drain. Large-format tiles can be paired with linear drains.
Whatever tile choice you go with, however, requires specific installation considerations. “In this small bathroom we chose 12×24 porcelain tiles and offset their pattern by thirds,” Jeff Patterson, the bathroom remodeler who runs the Home Repair Tutor Channel, says in his tutorial on curbless shower installation. “Most manufacturers recommend this pattern to reduce tile lippage, i.e. uneven tiles.” He goes on to explain that any tile over 15-inches on one edge is considered a large format tile, and although you can use these in curbless showers, he recommends a tile leveling system to keep tiles flat and maintain a consistent grout joint. Read how to lay large-format tiles here.
Linear or center drain?
Linear drains and curbless showers go together like peanut butter and jelly. But just because they allow you to create a one-directional slope required for large-format tiles doesn’t mean you can’t go with a center drain, especially if a homeowner wants the shower sloped to the center of the shower or room.
Additionally, linear drains are at times out of question: For example, Katie Petruzzo, drafting advisor, designer, and marketing and social media officer for Harth Builders, was not able to use a linear drain in one of her projects because of the kind of framing the bathroom had, TJI framing. “You couldn’t shave down the top of the joist.” Instead, the team went with a basketweave marble tile and center drain.
Bottom line: If you want a modern curbless-shower look with large-format tiles, a linear drain would be a good fit. If you want to—or need to—get creative with the drain placement and tile choice, consider a center drain. In both cases, ensure there is room to get the slope needed to drain properly without too dramatic of an incline.
Love curbless showers? See three design ideas with unusual tile choices here.

