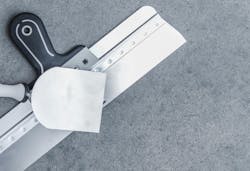
Easy Drywall Patch
Patching punctured drywall is a common repair, but a lot of people make it more complicated than it needs to be. The patching method I’m going to demonstrate here works with holes of any size up to the diameter of the largest hole saw you carry, which in my case is 4 ½ inches.
Step 1: Make a Butterfly Patch
Start with a scrap of drywall. I’m using ½-inch, which is the same thickness as the drywall I’m patching. One advantage this method has over other approaches—such as screwing through the drywall to secure a block behind the hole—is that you can use a patch that’s thinner or thicker than the drywall you’re patching.Drill a hole in the drywall scrap. Flip the drywall over so the back side is up, then use a hole saw to drill most of the way (but not all of the way) through the drywall [1]. Use a hole saw that’s slightly larger than the hole you want to patch. Because I’m patching two holes, I’m use two different hole saw diameters: 2 inches for the small patch and 4 ½ inches for the large patch.
Cut the patch to size. I like to trim the patch down to size after I drill the hole instead of before because it’s easier to stabilize a larger piece of scrap drywall while drilling. Once the hole is drilled, I score and snap the scrap to create a square patch, making sure to leave 1 ½ to 2 inches of material all around the hole. It doesn’t have to be perfect, so just eyeball the cuts.
Score the back paper. Working on the back side of the patch, use a utility knife to score the paper from the circular hole saw kerf to the edge of the drywall [2]. This will create a series of six to eight wedge-shape sections.
Peel away the wedges. Snap the scored cuts to separate the wedges, then peel the gypsum and backing away from the face paper [3]. Be careful to leave the face paper intact and clean off any gypsum that sticks to the paper so that there are no lumps or bumps along the perimeter of the remaining circular piece of gypsum.
What’s left is a “butterfly” patch. You can use it as-is (square shape), but I like to trim the corners of the “wings” to create a round patch.
Step 2: Make a Jig
The butterfly patch will fit into a hole you drill with a hole saw around the damaged spot in the wall you’re patching. But because of the damage to the drywall, the pilot bit of the hole saw has nothing to grab onto. So you’ll need something to guide the bell of the hole saw so it doesn’t jump around on you.
The solution is to drill a hole in a piece of plywood or scrap drywall [4]. The perimeter of that hole will serve as a guide and keep the hole saw steady when you drill the wall. In this example, I’ve drilled a small and large hole in a thin piece of lauan plywood to match the diameter of the two butterfly patches.
Step 3: Drill the Damaged AreaCenter the template over the damaged spot in the wall and use the hole saw to drill through the drywall [5A] [5B]. On big holes, such as the 4 ½-inch-diameter hole I’m drilling here, the teeth will grab the surface of the drywall and cause the drill to jump around. To prevent this, slip the hole saw into the template hole, slightly back it off the surface of the drywall, and get the bit spinning before pushing the teeth into the drywall.
Step 4: Set the Patch
You can test-fit the patch, but one nice thing about using a hole saw for this kind of patch is that it will always fit perfectly because the gypsum plug is smaller by the thickness of the hole-saw kerf. And, as I mentioned earlier, the thickness of the drywall you use for the patch doesn’t matter because the patch is held in place from the front, not the back.
Butter the hole with joint compound. The patch is held in place by joint compound, which should be well mixed to eliminate small bubbles that would later have to be sanded out. Apply joint compound to the inside edges of the hole in the drywall and to the outside area of the patch [6]. Don’t be afraid to lay it on thick.
Moisten the patch. I use a damp rag to moisten the back side of the paper [7]. Once the patch is in place, this will make it easier to force excess mud out from behind the paper. Otherwise you may end up creating some humps and bumps that will telegraph through the patch later.
Put the patch in the hole. To squeeze out the excess mud, work outward from the center of the patch [8]. Wetting the patch in advance makes this process easier and there is no need to add any joint compound to the face yet.
Apply a skim coat. With the paper butterfly “wings” firmly set in the joint compound, skim coat the entire patch just as you would any drywall joint. The wider the knife, the easier it will be to get a smooth result. After it dries, lightly sand the edges. Once it’s painted, the patch should be all but invisible.
This article is adapted from a video Paul made when he saw an opportunity for a teaching moment while remodeling his own kitchen. He popped a couple of holes in the drywall, then demonstrated a great way to patch them.
Get more Jobsite Know-How here
