Decks & Porches

Wood Decking Details

June 5, 2017
5 min read

Good-looking details don’t happen by accident. They are inspired by necessity and developed out of experience, and they endure because of careful planning and execution. ProTradeCraft.com visited a Built to Last Design & Build jobsite in New Milford, Conn., to watch how builders and remodelers Ben Bogie and Ryan Olivieri go about laying decking.

Measuring, Marking, and Cutting 

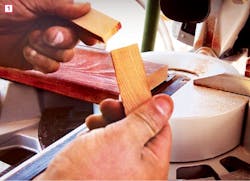
Deck jobs are typically work for two people, and that means two tape measures. Tapes can vary, even tapes of the same brand, so Bogie and Olivieri always compare tapes. If they’re not right on, they adjust dimensions up or down before making each cut.Remove split ends. Most wooden deck boards have splits at the ends that will grow if they aren’t removed. Even after cutting off the split, however, tension in the board may open a second smaller split. The solution is to make a series of additional cuts until the ¼-inch-thick cutoff doesn’t break easily when you tap it against the saw table [1]. This is an old furniture-maker’s trick

called the “tap test.”

Mark boards with a knife. After clipping off the split, Olivieri flips the board around and pulls his tape from the freshly cut square end. He marks the length with a utility knife, then holds the point of the knife at the mark and slides his square up against it [2]. This is faster and more accurate than trying to align the square with the mark first. He scores the cut line once or twice to create a crisp, visible line, which also reduces tear-out during the cut.

Nibble the cut line. Whether or not your saw has a blade alignment laser, you can ensure accuracy by working your way to the cut line with a series of small cuts or “nibbles.” After making the cut, seal the deal by soaking the end grain with stain to keep it from wicking moisture.

Neat, Well-Drained Notches 

On this wraparound deck renovation, the cable railing is a mid-century modern focal point. Bogie and Olivieri started the decking layout at the far outside edge, which is the longest—and most visible—straight line. Each of the outermost boards needed to be notched around the cedar railing posts. Here’s how they did it.

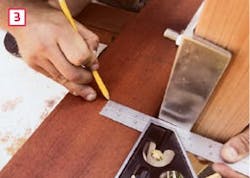
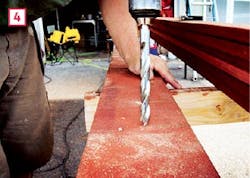
  Bogie set his combination square to the depth of the notch and marked the edges of the post [3]. He wanted the notch to be about a ¼ inch bigger than the post dimension, with rounded corners. By using a ½-inch brad-point bit to drill a hole at the end of each line on the board, he automatically got the right spacing and created a rounded inside corner [4].

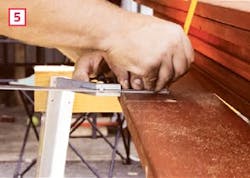
Next
, he drew lines to connect each pair of holes to each other and to the edge of the board, outlining a notch that’s about ¼-inch larger than the post [5]. After cutting out the notch with a jigsaw, he used a ¼-inch roundover bit in a laminate trimmer to ease the edges, then lightly sanded and stained the cut edges.

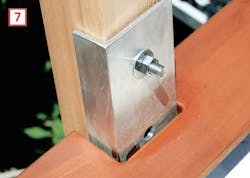
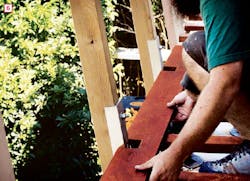
 A dry fit shows that every notch perfectly aligns [6]. Once fastened into place [7], this board establishes the line for all of the other deck boards.

Pattern Recognition

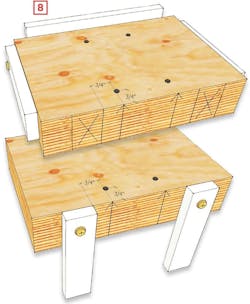
When it comes to exposed screws and spaces between boards, you can’t just line things up by eye; you need jigs and spacers to achieve a professional end result.To ensure straight lines of evenly spaced stainless-steel screws, Bogie and Olivieri use a site-built jig made from an 8-inch chunk of LVL ripped to the same width as the deck boards [8].

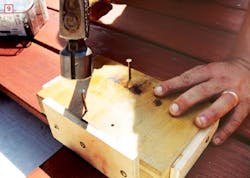
A fence along one long edge allows the jig to ride along the edge of a deck board. When the arrows on the side of the jig align with layout marks on the decking, nails slipped into the corresponding holes drilled through the jig mark screw locations on the face of the board [9]. One pair of
holes is aligned perpendicular to the jig and establishes equal distance between field screws on a single board; all four holes used together set consistent spacing at scarf joints or double joists. 

With the fence removed and replaced with the pair of auxiliary legs that are normally stored on the sides, the jig can be used to mark screw locations at single or double joists [10]

Spaced Out

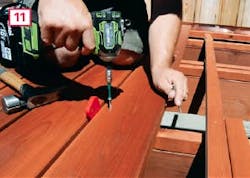
Bogie uses nifty colored-plastic spacers he gets from FastCap (fastcap.com) to ensure consistent gaps between boards [11]. The red ones are stackable and magnetic, and produce a ⅜-inch gap between boards.

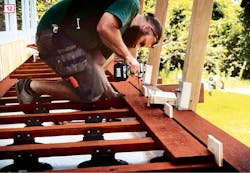
On this deck, one section uses 2x6 decking and an adjacent section uses 1x6 decking. The two types of decking slightly vary in width, so Bogie made custom plywood shims that enlarge the gaps to 7/16 on the thinner section to ensure that the boards and gaps are centered [12].Regardless of what kind of shim you use, stick it in the gap, push the deck board against it, and drive the
screw. If the board needs more encouragement, use a bar clamp. If you don’t have a long enough bar clamp, break out the old beater wedge. 

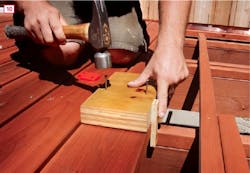
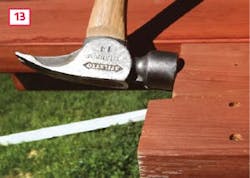
Start by butting a small 2x6 or 2x8 cutoff against the offending deck board and marking a line on the joist. Then rip the 2-by on a taper and fasten one half to the joist about an inch inside the line with the tapered edge on the side of the decking [13]. By tapping the other half of the ripped 2-by into the space between the block and the decking, you can persuade a bowed board into position. 

Get more Jobsite Know-How here

Sign up for Pro Remodeler Newsletters
Get all of the latest news and updates.