It helps when clients can preview their project in 3-D. I still occasionally build a mock-up, but I can accomplish the same thing in SketchUp using the Match Photo feature, which combines a SketchUp model of the proposed construction with a photograph of the existing condition. I’ve made a couple of YouTube videos that walk through the process, and this article summarizes the key steps.
Take a Photo
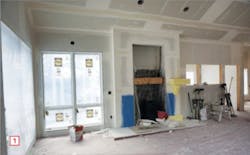
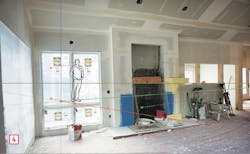
In this case, I wanted to show my clients how a mantel would look in their under-construction family room [1]. When photographing the existing space, carefully choose the vantage point. You want an angle that will give a good view of the final product, but sharply outlined reference points in all three dimensions will help later when it’s time to locate the model overlay in the photo. Inside and outside corners, window edges, and other clear lines work best, and longer lines are better.
Make a Model
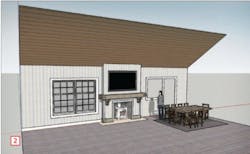
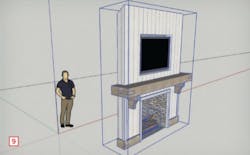
The next step is to build and save a SketchUp model of the 3-D object you’ll eventually import into the photo. In this example [2], I detailed the mantel and the wall where it would be installed and I also created a blank “movie-set” version of the rest of the space. It’s not necessary to model the surrounding space, but I find it’s helpful to have context when I’m building the 3-D object.
How much detail you include in the surrounding space is up to you, but the dimensions should be as close as possible to the actual dimensions of the space. In fact, the more dimensions you include in the model, the better. That’s because when the photo is imported into SketchUp, it’s just a bunch of pixels, and the Match Photo feature uses the dimensions from the model to scale the photo. It’s ultimately what makes it possible to accurately portray how the 3-D object will look in the actual space.
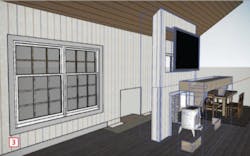
It’s also beneficial to create separate geometry for all of the parts and pieces needed to display the 3-D object [3]. In this example, each element—the mantel, firebox, fireplace surround, even the TV and the woodstove—exist as separate elements. Later on, I was able to “group” together the parts I needed—and only the parts I needed—to place into the photo.
Now the fun begins. When using the Match Photo feature, the sequence is important. If you bring the photo into the model and scale it, you can make a mess of things. After experimenting a bit, I find it’s best to import the photo into a new file, get it properly oriented and scaled, and only then paste in the 3-D object. Here’s the step by step.
Capture the 3-D Object
Save the finished project model, then select all of the elements from it that you want to display in the photo, GROUP them, and use CTRL-C (COMMAND-C on a Mac) to copy the group into memory.
Import and Orient the Photo
Now open a new SketchUp model and from the menu select CAMERA>MATCH NEW PHOTO. Then navigate to the folder where you saved the photo of the room and OPEN it. This will bring the photo into the new SketchUp model, along with a series of red and green lines [4] and a dialogue box.
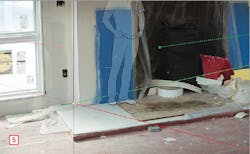
To orient the image within the SketchUp model, first place the point of origin (the intersection of the blue, green, and red axes). In this example [5], I placed the point of origin in the inside corner where the fireplace meets the outside wall. (This corresponds to the left boundary of the model I plan to import later.)
Notice that I zoomed way in to more accurately locate the corner. However, if you attempt to pan or rotate the model at this point, you will cause the photo to disappear. To get it back, click the blue tab above the dialogue box in the upper left corner of your screen.
The blue axis won’t be perfectly aligned with the vertical drywall corner at this point, but it gets closer as we adjust the position of the red and green reference lines, which set the perspective of the SketchUp model within the photo. This is where the vantage point of the photo comes in handy.
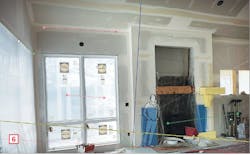
Grab one of the red lines and align it with a sharp left-to-right line in the photo. Zoom in to place it more accurately [6]. Repeat with the other red line, keeping in mind that the farther away you locate the second red line from the first, the more accurate the orientation of the photo in the model will be. Do the same with the green lines along photo elements that run from front to back.
Save your work at this point. You may have noticed that when you manipulate the green and red lines, all of the other lines move around, too, including the blue vertical axis line. That’s normal, and everything should settle down once the green and red lines are located. In my case, the fireplace model I want to overlay onto the photo is a strong vertical element, so I tweaked the upper green line until the blue axis followed the drywall corner perfectly. This ensured that any distortion from the camera lens would show up elsewhere in the image and not affect my overlay. Click DONE to close the import function.
Scale the Photo
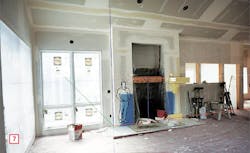
At this point the photo is properly oriented in the new SketchUp model, but the dimensions are arbitrary. To ensure that my 3-D object fits into the photo as it should, I need to scale the photo using a known dimension. In my case, I built the mantel model so that the top of the mantel was 60 inches off the floor. To set this dimension in the photo, I used the TAPE MEASURE tool to click on the red axis and drag a reference line to the top of the yellow foam mantel I had mocked up against the fireplace wall [7]. Next, I used the LINE tool to draw a line along the blue axis between the point of origin and the reference line I just created. It’s OK if the photo disappears while you’re doing this; when you’re done, just click the blue tab to get the photo back.
Now for the moment of truth. Using the TAPE MEASURE tool, click one end of the vertical line you just drew, then the other, and type the dimension 60 into the value control box at the bottom right corner of the screen. When you hit ENTER, a dialogue box will open, asking “Do you want to resize the model?” [8] When you click YES, the model, which now includes the oriented photograph, will be scaled to the known dimension of 60 inches.
Import the 3-D Object
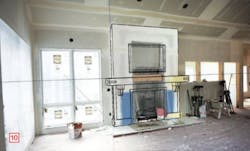
With the photo oriented and scaled, paste in the 3-D object that you saved into memory earlier (CTRL-V on a PC, COMMAND-V on a Mac). The 3-D object should appear in the new model, but it won’t necessarily be properly positioned yet because SketchUp may not know where to locate it. If something like this happens, don’t panic. Simply use ROTATE or other tools to manipulate the pasted-in 3D object until it is correctly oriented. In this case, I had to move it back and to the left to align it with the inside corner where I had earlier placed the point of origin [9]. Moving the model will make the photo disappear, but this often makes it easier to see the reference lines in the model. When you click the blue tab and the photo returns, the model will be perfectly positioned [10].
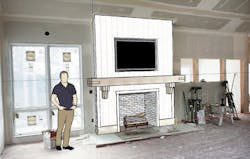
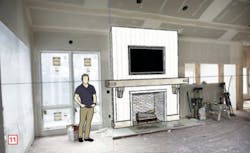
Voila! The model of the mantel is now displayed in the proper position in a photograph of the existing room [11].
Get more Jobsite Know-How here
About the Author
Matt Jackson
Matt Jackson is a master carpenter who lives and works in Rapid City, S.D. He is a contributing editor to ProTradeCraft.com, where a version of this article first appeared.
