How to Demo Drywall Fast, Clean, and in One Piece
What's the best way to remove drywall?
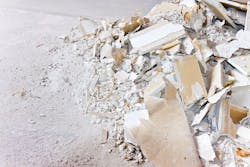
Most demolition crews remove drywall by banging holes in it with a sledgehammer, then tearing it off in pieces. The last step is to remove any chunks of drywall surrounding the screw and nail heads, and yanking or backing out the fasteners. Actually, that’s the next-to-last step; the last step is to shovel and sweep up mounds of crumbly drywall while trying to contain clouds of dust.
That bull-and-jam method may work on a gut remodel with nobody home, but for smaller projects, it’s just plain backwards. Why not remove the screws and nails first, and pull the sheets off the wall in one piece, with minimal dust or mess? That’s the question Matt Jackson asks and answers in a video that shows just how he goes about it.
Cut Corners
The setting for Jackson’s video is a bathroom remodel for which he needs to remove the tile and drywall from the floor and walls. The video begins after he’s already stripped the floor to the bare plywood and removed a partial wall, leaving a bundle of wires and device boxes hanging. All that’s left is to demo the drywall from the back wall, which is about 6 feet long. He could use a hammer, but “when there are finished surfaces involved,” he says, “I don’t like to hit things that hard if I don’t have to.”
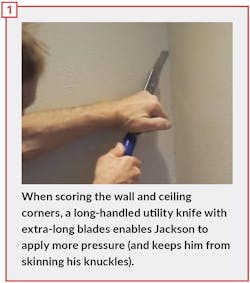
Instead, he first scores the drywall tape in the corners along the adjoining wall and the ceiling [1]. For this he uses a 13-inch Pipe Handle Cut-Out Knife from C.R. Laurence (CRL), equipped with CRL’s 3¾-inch Extra Long Utility Knife Blades. “With this long handle,” Jackson says, “I can put plenty of leverage on there and not worry about slipping and cutting something. And I don’t rub my knuckles on the wall like I would with a regular utility knife.”
The extra-long blades ensure that he can cut through the joint compound, and even the full thickness of the drywall, if necessary. This was the case in the vertical corner, where the sheet he was removing was trapped behind the drywall for the adjoining wall. At the horizontal joint against the ceiling, Jackson holds the knife close to the ceiling drywall, which has usually been hung first. This makes it easy to cut through the tape without damaging the drywall on the ceiling. “Now when I go to pull these sheets loose, [the paper] won’t peel back onto [the adjoining surfaces],” Jackson says. “It makes the piece come out cleaner and easier.”
Remove Screws
Next, Jackson removes the screws using a cordless drill and a smaller-than-usual Phillips bit, which does a better job of digging through the joint compound than a standard #2 tip. Some screws are visible because of puckers or shadows in the joint compound, but Jackson finds those he can’t see using a Rack-A-Tiers #52300 Studball Magnetic Stud Finder [2]. “I just rub it around the wall until it locates a screw,” Jackson says. Because the round magnet contacts the wall at a single point, he can easily see where it sticks to the screw. In fact, when Jackson accidentally dropped the Studball, he discovered that it attracted dust particles from the floor that left a smudge on the drywall, making it even easier to locate the screw heads. Once a screw is located, Jackson digs it out with the drill.
Learn how to make drywall airtight.
It takes a little more time to locate the screws this way than it does after demolishing the drywall with a hammer, but the time saved in cleanup and disposal more than makes up for it. Parts of the video were sped up while Jackson was locating and removing screws, but I’m guessing it took him less than five minutes to find and remove all of the screws from both sheets.
The Studball method also works to locate nails, and although a cat’s paw puller will probably do the job, Jackson is partial to a Slide Hammer Nail Puller, which is typically used to pull nails with minimal damage to finish materials. (Not many carpenters have ever even seen this tool, so Jackson has made another video, “How to Use a Slide Hammer Nail Puller,” explaining how it works.)
Pull Panels Off in One Piece
With the seams cut and all screws removed, all that remains is to pull the drywall panels off the wall. Removing the bottom panel was complicated by the penetration of the drain and the copper waterlines just in front of it, and also by the fact that it was locked into the corner by the drywall panel on the adjoining wall.
Jackson starts by pulling the free end of the lower panel away from the wall while pushing on the upper panel just above the seam between panels [3]. The crease this creates makes it easy to cut the seam, this time with a regular, short-handled utility knife for better control. After a little fiddling with the drain line, Jackson lifts the free end of the panel and it comes away cleanly. The upper panel comes away even more easily.
Cleanup
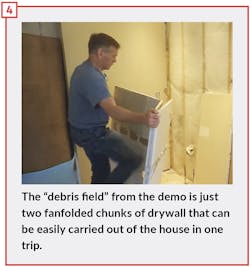
With the panels removed in one piece, all that’s left is to score and fanfold them [4], and carry them down to the truck for disposal. No shoveling, no trail of dust on the carpet. “I’m able to surgically remove these pieces of drywall without building clouds of dust or creating buckets and buckets of crumbs,” Jackson says. “Plus, there’s much less risk of damaging existing surfaces, when the drywall is taken out in an orderly and controlled manner like this.”
Thanks to Matt Jackson, a master carpenter, SketchUp Wiz, YouTuber, and contributing editor to ProTradeCraft.com. This article was adapted from his video, “Surgical Remodeling: Remove Drywall Fast, Clean, and in One-Piece.”
RELATED: How to Cut Holes in Drywall


