Photos: courtesy ProVia
When it comes to stone, mediocre installation leads to a mediocre result. On the other hand, the right grouting techniques can create a showstopper. Here are some general guidelines to follow for an installation using a typical ⅝-inch grout joint.
Always begin your installation with outside corner pieces, if applicable. Each corner has a long leg and a short leg, so be sure to alternate them as you go up the corner.
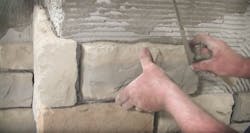
Mortar can be individually applied to the back of each stone, directly to the installation surface, or a combination of both. We recommend a scratch coat of mortar using a ½-inch notched trowel the day before installation.
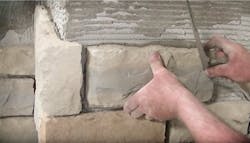
When it’s time to install the stone, apply mortar to the back of each piece, then wiggle the stone onto the scratch coat. Use enough pressure to squeeze out a small amount of mortar. The mortar on the stone will lock into the keyways in the scratch coat, securely holding the stone in the wall.
Remove any excess mortar that squeezes out at the edges. This will prevent water penetration and avoid problems during freeze-thaw cycles.
There are many attractive grouting techniques, each with its own character. Colored grout can create a contrasting or complementary look, raked joints provide a traditional feel, and rough joints are more rustic. Over-grouting (grout that stands slightly proud of the ⅝-inch joint) gives an Old World look if used with the right stone profiles.
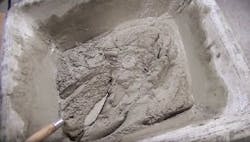
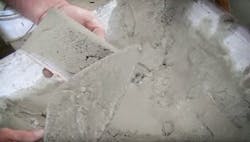
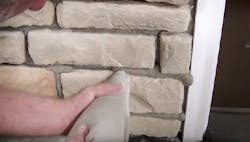
The grouting mix should consist of one part Type S or N mortar to two parts sand, and clean, potable water. We typically recommend Type S mortar because it makes for a stronger bond. Whichever you choose, make sure it’s ASTM C91-compliant. Thoroughly mix your grout to a heavy cream-like consistency and place the mixture in a plastic grout bag. Snip the pointed end to create a hole about the size of a penny and no larger than a quarter.
Fill the bag to within 8 inches of the top, then twist the top and hold tight. Place the open end of the bag in the joint and, somewhat like using a caulking gun, fill the joint flush with the stone.
Don’t get mortar on the finished faces of the stones, and be sure you can complete the entire grouted area before the mortar sets.
When the mortar joints become firm, use a wooden striking tool or a metal margin trowel to compress the grout, which fills any voids. Remove excess mortar until the joint reaches the desired depth.
The final step is cleanup, which makes all the difference in the look of your finished job. Joints should be brushed within 2 hours (depending on weather) after tooling them. It’s important not to brush wet mortar because it will smear and look unsightly; but it’s equally important not to let the mortar set overnight before tooling or brushing, since it will be difficult to work the hardened material. Use a clean whisk broom or any plastic-bristled brush (avoid metal, as this could damage the stone).
About the Author
Wendell Mast
Wendell Mast is director of product development for ProVia, a leading maker of doors, windows, vinyl siding, and manufactured stone.
