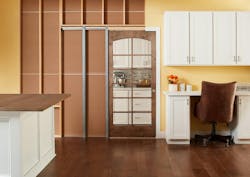
6 Must-Knows for Installing Pocket Doors
Here’s the thing with pocket doors: if you don’t get the install right, it creates problems down the road, so it’s crucial to do it correctly the first time. Your chances of fixing a concave or poorly installed pocket door are zero to none.
With more than two decades of experience in construction, I’ve picked up a few musts for pocket door installs:
1. First and foremost, you must select the correct wall.
If the wall is load-bearing, you will need to frame it to allow for all loads to be transferred properly. It’s also important to ensure there are no electrical, plumbing, or return air vents inside the cavity. If there are, route them appropriately.
If installing behind wall cabinets, the wall must be at least 2x6 to allow for enough anchor for cabinet installation. The last thing you need is a cabinet screw in the way of the pocket door when trying to close.
If installing in a standard 2x4 wall, order a 1-3/8" or 1-3/4" door to allow for proper clearance. If it’s too tight inside the wall, it will rub. If you are installing in a 2x6 or greater 1-1/4" door will work, but check your pocket door frame.
RELATED: Framing Tips for Double-Stud Walls
2. Before removing any drywall, measure twice, and cut once. A good quality level will be your number one friend.
Make sure you do not use too long of a screw when installing sheetrock either. The last thing you want is a screw head to penetrate sidetracks, screws will rub and damage the door and it will not open or close properly.
When hanging drywall, you do not want sidetracks to bow outward or inward. Often, board hangers put too much pressure on side tracks when hanging the drywall, so use extra caution, let the drill do the job, and do not push too hard or side tracks, or they will become concave and cause issues down the road.
3. Allow for double the width of your pocket door to give enough room for the door to fully lie inside the wall cavity.
Make sure you add door width plus the additional amount of space indicated in your frame’s installation instructions. I typically give myself at least two additional inches in the rough to allow for hardware, for example: a 36-inch door, a 36-inch wall cavity, plus 2 inches for hardware. The same goes for height.
4. When figuring height, allow for an additional 2" header height higher—or what's noted in the frame's instructions—than a standard door, allowing optimal clearance for hardware to function properly.
Find the dead center of the wall and use a screw at the correct height when installing the upper track. It's easier to adjust a screw than a nail.
Having the upper track perfectly level and centered in the wall is key. Make sure you install all screws in the allotted holes. The last thing you want is the track to rack after drywall installation, you will not be able to adjust without removing the drywall board.
5. The upper track has to be 100% level. I can't emphasize this enough.
When installing the lath catches/side tracks for drywall, use a level and a pencil to replicate the bottom plate location. Sidetracks have to be 100% plum with adjacent walls. Directions say to use a chalk line, which works, but a pencil and long level or straight edge are less messy.
RELATED: How to Install Fake Beams Like a Pro
6. When installing hardware for mounting the door, ensure the hardware is centered on the door so it glides centered in the tracks.
I only use Johnson Hardware in my builds, and have found it to be the best by far. I also like providing my clients with its soft-close options, which is a luxurious feeling for not a lot of money.
If tracks are not plum, you’ll have major issues, and the door will never function properly. Doors must be primed, painted, and stained before final installation.
The problem with any construction site is you have multiple people touching that area. Typically rough carpenters may install the door frame, but I have my finish carpenters do it since they’re the ones hanging the door at the end. And even drywallers or sheet rockers can cause issues with bowing. The solution is to ensure everyone knows exactly what to do for the perfect installation.


