Remodeler Michael Anschel of OA Design+Build+Architecture wants to provide a resilient, comfortable, and beautiful new basement in this 100-year-old Minneapolis home. To do so, he wants to ensure he gives these homeowners a well-insulated sub slab. (He even goes the extra mile to plan for hydronic tubing for a heated floor.)
The remodeling work being done on the home’s first floor made this project necessary. The first floor work resulted in major structural changes, which then resulted in needing to replace the primary footings used to hold the central bearing beam of the home.
“And to do that was pretty easy. We cut open the slab, we dug down some ways, we poured a new footing, and we were able to replace all of that,” explains Anschel. “When it comes to the perimeter though, it gets a lot more challenging.”
This Minneapolis project is the basis for ProTradeCraft’s Building Resilience season three. Follow each step by reading, or see more from season three at ProTradeCraft.com.
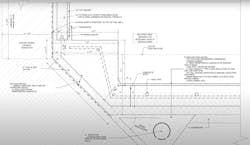
The foundation had no footing underneath, so the team excavated soil, formed a curb, and added rebar. Then came the fun parts: insulating and heating.
EPS versus XPS for Insulation
Project architects selected expanded polystyrene insulation (EPS) rather than extruded polystyrene (XPS). EPS is better environmentally, but it’s outperformed by XPS when placed under the slab.
The team went with DuPont’s new XPS, the ST-100 Series. It’s a low global warming potential (GWP) product that meets the needs of the install: 25 PSI and a 0.1% water absorption.
Dissecting Under the Slab
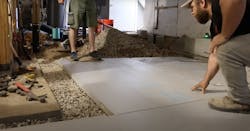
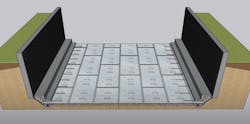
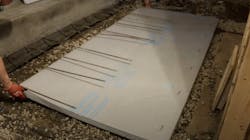
Before adding the insulation, the team sets a smooth layer of crushed rock, ¾-inch in diameter or larger, on top of the sand. On top, the team places two inches minimum of the XPS insulation. These are slipped under bent up rebar. On top, the team places a plastic sheet.
An important factor of the layer, Anschel points out, is the capillary break—the crushed rock.
“And the reason that works so well is while sand particles are really close to each other, water can work its way up through the sand,” he explains. “But with the crushed rock, the voids are too large for water, which is fairly sticky stuff, to work its way up. So, the rock is your capillary break.”
After placing the XPS, which creates a smooth foundation for the next trades, the team checks the elevation of the sheet with a laser. They continue this process until they cover the entire floor, working with large perimeter sheets and cutting sheets to fit into those tricky spots.
Installing Floor Heating
Before the team staples the hydronic tubing in place, the seams between XPS sheets are taped. This helps the slab cure slower.
While the plumbers installed tubing under the slab, they also went ahead and stapled hydronic tubing under the first floor, the basement ceiling.
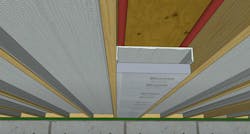
ProTradeCraft outlines that the tubing is stapled into the joists about two inches below the subfloor. A reflective bubble wrap radiant barrier will work to reflect heat into the subfloor. Friction fitting in styrofoam insulation between the joists restricts heat flow. It’s then all covered in drywall.
