How to Custom Bend Window Drip Cap Flashing
Even when a window is properly sealed to prevent water from reaching the sheathing, it still makes sense to direct bulk water away from the building. That’s what metal head flashing is for, and when properly tucked behind the housewrap and taped, it does a pretty good job. But water can still flow off the sides of the flashing, where it soaks the joint where siding meets the casings.
Here’s a simple way to create end dams to prevent that. You can make these dams on standard window cap flashing, the kind that has two legs bent at a 105-degree angle and a ¼-inch drip bend. It takes about 5 minutes to do both ends, and all you need is a pair of snips, a wide-mouth sheet metal clamp, and a hammer.
Layout and Snip
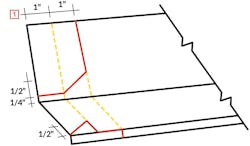
Make sure the piece of flashing is 4 inches longer than the trim it will cover, then pencil in the cut lines. Scribe a line across the face of both legs of the flashing 1 inch in from the end, then a second 1 inch away. Pencil in the other lines as shown [1]. For clarity, the drawing shows dashed lines used for layout purposes, but you will cut only on the red lines.
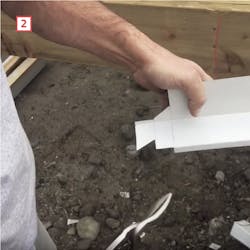
When you’re done with the snips, the end of the flashing should look like this [2].
Two Bends Make the Corner
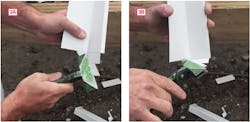
Now comes a series of bends to build the end dam. Start by positioning the sheet metal clamps at a 45-degree angle, with one corner tight into the inside bend of the flashing [3A]. With a firm grip, bend the metal upward, creasing it along the pencil line you made across the face [3B].
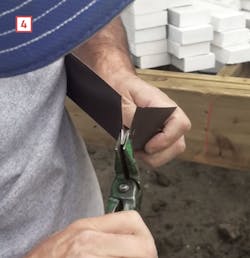
To bring the corner together, work from the back to pinch together the V-shaped pouch created by the first bend [4]. Use a block and few light taps with a hammer to flatten the triangular fold flat.
Reinforce and Lock
That’s all it takes to form the inside corners; the remaining bends strengthen the end dams and lock the folds in place.
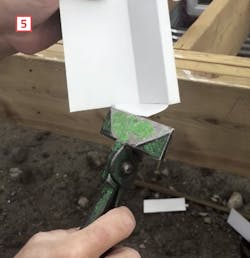
To reinforce the end dam, use the metal clamps to grip the top half of the end dam along the pencil line, then bend the metal back on itself [5]. Reset the clamps as needed to press this fold flat.
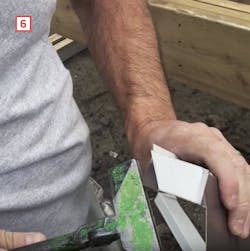
Lock this fold in place by bending the remaining triangular flap against the face of the metal [6], again using a block and hammer to tap it flat.
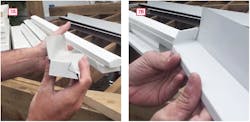
The result is a folded end dam that looks good on the outside [7A] and doesn’t require any caulking on the inside [7B]. This method of folding the end dam maintains the 105-degree angle of the cap flashing, which directs water off the flashing’s drip edge and keeps it from cascading over the side.
Get more Jobsite Know-How here
Adapted from the video “Drip flashing with end dam” originally published on YouTube by Mike Gandy, and curated at ProTradeCraft.com under the title “Sweet Way to Bend Drip Cap
For Windows.”
