How to Make Drywall Airtight
An air barrier stops air from leaking into exterior walls. That not only keeps heat from escaping, but it also prevents moisture from entering into stud, joist, and rafter bays where it could condense and cause hidden mold and rot.
Drywall can be an effective air barrier, but only if you are careful to stop air from moving through electrical outlets, light fixtures, and other holes that connect living space to wall and ceiling cavities. The combination of the drywall, framing, and caulk, foam, and sealant make up the air barrier assembly. Here are five areas where a little bit of extra effort during drywall installation can prevent potential leaks.
Electrical Boxes
Sealing the holes created by electrical boxes eliminates a major source of air movement into exterior walls. Because of the stack effect—the tendency of air to enter low and exit high in a building due to the difference in density between warm air and cold air—isolating fixture boxes in ceilings is even more important than in a wall.
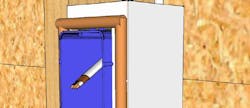
One solution is to apply caulk or low-expansion foam where wires and fasteners penetrate the box. Or you can install EnergyBlocks (energyblock.com), foam boxes that can be sealed in place around outlets, switches, or light boxes after the wiring is in place [1A, 1B]. EnergyBlocks come in three sizes and cost between $3 and $5 each (less when purchased in quantity).
Can Lights
Recessed lights generate heat, creating a chimney effect that draws moisture-laden interior air into joist or rafter bays, where it can condense against cold rim joists or roof sheathing. Placing a bead of sealant around the perimeter of the can light will help, but building an airtight box around the fixture can do even more. You can make it with drywall or rigid foam [2A], but make sure the fixture is IC-rated; otherwise it may overheat and trip the built-in thermocouple.
Wall and Window Framing
Another big source of leaks is the actual wall framing. In general, if you glue the drywall to the studs, you’ll plug a lot of holes.
Gluing drywall to the studs is nothing new; drywallers often use adhesive to eliminate fastener pops. You can upgrade the process energy-wise by using adhesive plate-to-plate on each stud, and also along the perimeter of each wall and window opening. This will make all of the gaps between the drywall and framing airtight.
Flexible caulking and acoustical sealant are flexible and will stretch, making them a good choice for the long term. But because most drywall contractors already carry a box full of adhesive tubes, it’s likely that adhesive will be the convenient choice. The important thing is to apply a continuous bead about 3/8 inch thick.
To seal around window and door openings, run a bead of adhesive along the gap between king and trimmer studs [3] and make sure that all beads intersect around the opening and also at the top, bottom, and corners. At partitions, seal all of the seams in the framing [4A].
Intersecting Partitions
You wouldn’t know to look at it, but the joint where an interior partition meets an exterior wall creates a 16-foot-long crack in the wall, even if the end stud of the partition meets solid framing. One solution is to seal the gaps in the framing at the plates [4A] and to float the drywall in the corners to reduce cracks.
But the best way to deal with this crack is to not create it in the first place. You’ll need some cooperation from the framers, who should leave a gap between the partition and the exterior wall so that you can run the drywall continuously through the intersection [4B].
Wall-Ceiling Joints
The ceiling is open to air leaks wherever it meets an interior or exterior wall. As with interior partitions, this is true even where there is solid blocking, so I seal the perimeter of the ceiling, too.
I use expanding foam to seal the gaps, applying it either from above in the unconditioned attic [5] or from below after the ceiling is hung but before the walls are butted up to the ceilings.
It takes extra time and attention to detail and properly air seal a building, but when the architect, general contractor, and subcontractors are on the same page, you can close the book on air leaks.
———
These details are adapted from an animation produced by Professional Remodeler's sister site ProTradeCraft.com and inspired by Myron’s blog at ThisIsDrywall.com.

