flexiblefullpage
interstitial1
Currently Reading

How to Weatherize Roof-Wall Intersections

Advertisement
billboard
Construction

How to Weatherize Roof-Wall Intersections

Mitigating moisture between changes of materials and panes requires special attention


By Kaylen Handly | Benjamin Obdyke June 3, 2024
wrapping a roof
Step-by-step instructions for weatherizing roof-wall intersections. | Photos courtesy Benjamin Obdyke

Around the building envelope, any intersection of two different materials or elements creates a challenge. Some of the most difficult scenarios are the roof-wall intersections—where one part of the roof butts up against a wall section, such as at eaves and rakes, dormers, a garage roof next to a second story, sidewalls, and headwalls.  

This requires proper planning, or else it becomes easier for moisture to get trapped or products to fail, leading to rot and other issues down the road. These steps will increase the effectiveness of your installation and ensure your wall and roof integrations leave no room for moisture vulnerabilities.


The Pre-Construction Phase

Weatherizing roof and wall intersections requires communication and coordination between siders and roofers, just like a window installation. Proper scheduling and alternative solutions are necessary, but above all, both contractors must follow the correct sequencing of weatherization layers to ensure no moisture can be trapped. 


Step-by-Step Installation of Roof-Wall Intersections With Self-Adhered Roofing Membrane and Weather-Resistant Barrier

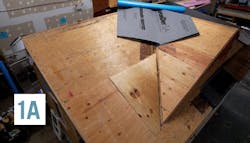
The first step is to have clean, dry roof sheathing. Begin by chalking the layout for smooth installation.  

roof wall intersection
Clean and dry roof sheathing ready for the installation of the roofing membrane.
roof wall weather barrier
Example of chalk lines on the roof sheathing to layout the installation. 


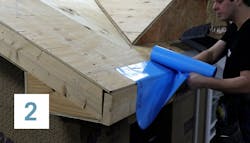
Next, install the roofing membrane at the roof-wall intersection like headwalls and sidewalls.

Extend the membrane 6-12 inches up the wall at the intersection. With acrylic self-adhered membranes, apply pressure to activate the bond of the adhesive to the substrate—pressure activates the adhesive in acrylic self-adhered products.


self adhered membrane
Showcasing the installed roofing underlayment on the roof plus 12 inches up the wall.  


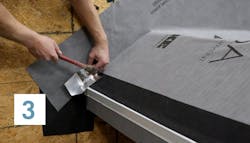
Once the roofing membrane is installed, use a joint method of kickout flashing and step flashing at the intersecting points of the roof and the wall. 


kickout flashing
Nailing the kickout flashing onto the roofing underlayment. The acrylic self-adhered membrane will self-seal around all nail penetrations.


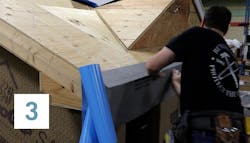
Follow with the installation of the weather-resistant barrier (WRB) on the wall intersecting the roof. Shingle lap the WRB over the roofing underlayment and kickout flashing so that water flows down and out rather than under the layers. 


roof wall weather barrier
Shingle lapping the WRB over the roofing underlayment and kickout flashing.


roof WRB
Creating a cutout for the kickout flashing. 


Due to the complicated nature of kickout flashing, the WRB must properly overlap the front of the kickout flashing. You can do this by cutting slits in the WRB to cover the kickout flashing.
 

roof flashing
One section of the WRB cutout is placed behind the kickout flashing.
self adhered membrane
The other section of the cutout is sealed on top of the kickout flashing. 

If the installation cannot be done in this order due to scheduling or material delays, the contractor installing the WRB should leave a 16 to 24-inch flap at the bottom of WRB unattached. Then return to apply the kickout flashing and apply the remaining WRB flap after the roofing underlayment is installed.

If the WRB is installed before the roof flashing details, it can cause water runoff behind the step flashing, leading to potential leaks. 
 

Step-by-Step Installation for Rake and Eaves Details, Areas that Require a Drip Edge  

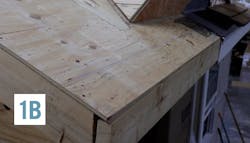
Before installing the eave and rake details, the WRB must be properly installed on the exterior walls.  

eaves
WRB installed on exterior walls.


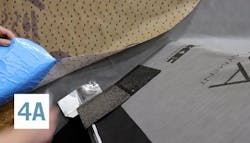
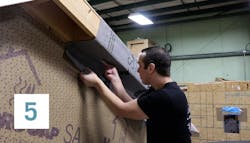
Once the WRB is installed, cut the roofing membrane down to cover the surface of the subfascia and about 8 inches of the roof sheathing. 
 

roof flashing
Sizing the roofing membrane to cover the fascia, subfascia and roof sheathing. 


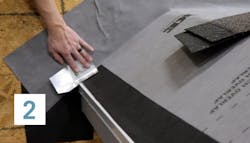
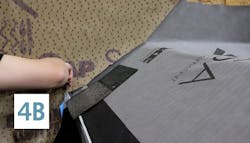
Next, apply pressure to adhere the roofing membrane to the subfascia and roof sheathing.  


underlayment
Applying pressure to the underlayment to bond to the fascia and roof sheathing.

After finishing the eave details, install the roofing membrane on the rake. 
 

rake and eaves
Beginning to install the roofing underlayment on the rake.


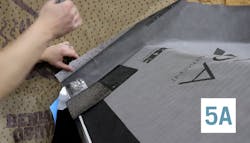
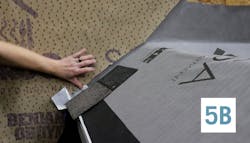
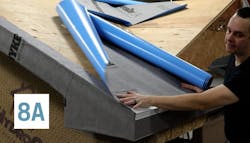
Cut the roofing membrane so it covers the subfascia, 4 inches of the roof sheathing, and 4 inches of the wall. Adhere the roofing membrane to the subfascia on the rake using pressure and overlap it on the wall at a minimum of 4 inches for optimal air sealing.  


roof flashing
Adhering the roofing membrane 4-inches down the wall.

For maximum protection against ice dams, the roofing membrane must be adhered to the subfascia before installing the drip edge. 
 

roofing membrane
Installation of roofing membrane on fascia and subfascia for eaves and rakes.


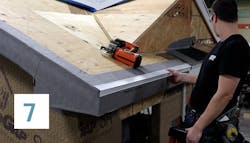
Once all eaves and rakes are covered with the underlayment, install the drip edge on the first layer of the roof membrane. 
 

roofing membrane drip edge
Drip edge installed on the first layer of membrane.

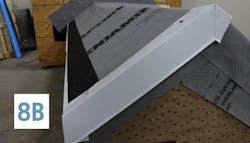
Once the drip edge is installed, shingle lap it with the roofing underlayment. When the drip edge cannot be properly shingle lapped, use flashing tape to prevent water from running behind the drip edge. 
 

rake and eaves
Proper overlap of membrane on drip edge.
rake and eaves
Example of flashing over the drip edge when unable to shingle lap the underlayment


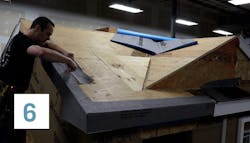
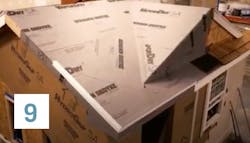
Once the eave and rake details are finished, the layout of the roofing membrane on the entire roof deck can begin.   
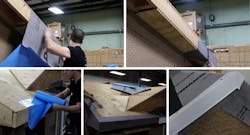
 

roofing membrane
Layout of roofing membrane with eaves, rakes and drip edges completed


Add new comment

Plain text

  • No HTML tags allowed.
  • Web page addresses and email addresses turn into links automatically.
  • Lines and paragraphs break automatically.
leaderboard2

Related Stories

NARI Renames Awards Program

The awards program has a new name, but continues its tradition of recognizing the best in residential remodeling

3 Steps for Installing House Wrap and a Rainscreen

ProTradeCraft's Building Resilience walks you through how to install a self-adhered house wrap, liquid flash obstructions, and top it off with a rainscreen

How to Insulate a Heated, Structural Slab with XPS

ProTradeCraft's Building Resilience season three starts with making a basement more comfortable

How to Retrofit Foundation Footings

To make a low-height basement a more comfortable living space, this remodeler digs deeper but needs to add support to do so

6 Must-Knows for Installing Pocket Doors

Save your sanity: Do it right the first time

Crawl Spaces to Basements: Proceed with Caution

Converting a crawl space to other uses can upgrade a home and add significant value, but when done incorrectly, it can also be disastrous 

You Need to Talk About It: Mental Health in Construction

Men in the construction industry die by suicide at a rate nearly four times the national average. What should business leaders do about it?

How to Attach a Patio Roof to an Existing House

Discover expert tips on how to attach a patio roof to an existing house. Elevate your homeowner clients' outdoor living spaces with our comprehensive guide.

How To Improve Energy Performance in Existing Attics

There’s more to insulating the attic than attic insulation; there’s venting, air sealing, and misery

How to Install PVC Bevel Siding Over Rainscreen

It’s a lot like installing wood bevel siding, except it won’t warp or rot. And it expands and contracts differently and for different reasons

Advertisement
boombox2
Advertisement
halfpage2
Advertisement
native1

More in Category


Advertisement
native2
Advertisement
halfpage1
Advertisement
leaderboard1