Photo: Philip Wegner Photography
After tearing down three interior walls in our old farmhouse, which has been cut and pasted together multiple times over the last century, we discovered that the 1980s ceiling fan/light fixture just wasn’t going to work anymore. The adjoining room’s mishmash of recessed cans in our 9-foot ceilings were ill-placed around the perimeter of the room, creating four corners of high-wattage hot beams and a light wasteland in the center of the room where we needed illumination. While we eagerly planned for a larger living space and began tearing down walls, we hadn’t put much thought into the importance of lighting our new open floor plan.
Lighting is an often underserved and underappreciated part of a remodel and is frequently just an afterthought. It’s an intangible, yet it greatly affects the environment of a home.
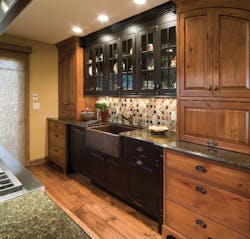
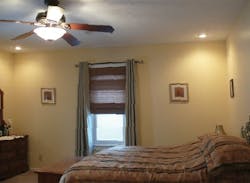
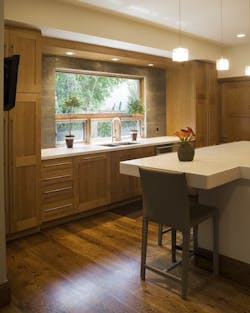
Darker surfaces require more illumination than lighter ones. In the photo below, left, carefully placed 5-inch recessed cans with PAR lamps and continuous undercabinet fixtures provide ample lighting for this retro farmhouse kitchen by Reconstruction Experts, Andrea Lawrence Wood Interiors, and Doug Walter Architects. Recessed lighting in the four corners of the bedroom (below, right) and a light kit on the fan provide this room’s illumination. However, once the fan is removed, a new lighting plan will be needed. (Photos: below, left, Philip Wegner Photography; below, right, Elizabeth Mack)
Designing the Lighting Layout
There are three basic questions to answer when designing a lighting layout, says Phil Richards, senior instructor for lighting manufacturer Juno Lighting Group.
- How much light do I need?
- What do I want to illuminate?
- What quality of light do I need—warm, cool, or neutral?
Wood—including cabinets, bookcases, and architectural details—looks best with warm-toned lighting. Crystal or glass should have cooler tones. General layout guidelines suggest positioning cans 2 to 4 feet off the outside walls and dividing cans around the room evenly while leaving at least 2 feet between each fixture. These guidelines are a suggestion, and aren’t necessarily ideal for everyone. Use recessed cans strategically and avoid aligning them in a grid or peppering cans throughout a space without a purpose, Richards suggests.
To determine the most efficient lighting, you need to know how the space will be arranged. “Basic code requirements don’t take into consideration the owner’s use of each room,” says Denver architect Doug Walter, a regular contributor to Professional Remodeler. “For instance, most basic kitchen layouts place the recessed lights over the aisles. Unfortunately, when the cook’s at the stove, he or she will be working in their shadow.” Walter recommends placing kitchen ceiling cans 24 to 26 inches out from the wall, so the beam’s center is at the edge of the counter, not on the floor behind the cook’s back. (Read more about the right way to light a kitchen.)
“With cans placed closer to the upper cabinets, not only is there more direct task light on the counter,” Walter says. “but there’s less need for cans in the walkways because light bouncing from the work surfaces will be more than enough.”
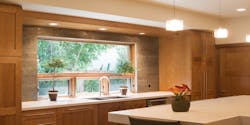
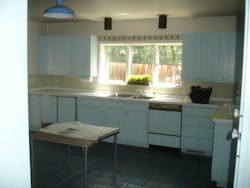
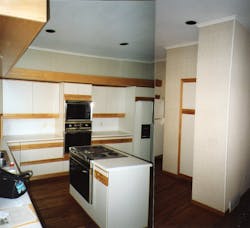
This 1976 kitchen had a country vibe (before photo, below, right). Lighting consisted of two surface cans and a warehouse pendant over the table. The new kitchen (below, left) features an enlarged, south-facing window array (daylighting is the first choice for illuminating a kitchen). The team from Creative Remodeling and Doug Walter Architects used a cabinetry light bridge with recessed cans over the sink area. (Photo, below, left: Philip Wegner Photography)
Size and Layering
Size recommendations say to place 4-inch lamps 4 feet apart and 6-inch lamps 6 feet apart. However, these are general guidelines. Customized layouts should include a mix of lamp sizes.
Experts prefer to illuminate rooms in multiple layers to avoid flat, uninteresting lighting: “Each layer of light performs differently, and each layer should be switched independently of other layers and controlled on its own dimming zone,” Richards says. It’s far better to over-light a space and install dimming switches by zone than it is to under-light. Dimmers not only decrease energy use, lessen heat output, and increase bulb life, but they also offer the homeowner individualized control.
Smaller task or accent lighting using 2-inch or 3-inch lamps can work in conjunction with well-placed general recessed lighting. Incorporating smaller task and accent cans with 4- to 6-inch perimeter lighting creates contrast and interest in a room. Gimbal lights are a great choice for a variety of task and accent lighting needs. Positioning an adjustable gimbal above a location dedicated to the user’s intended task will offer the best possible illumination, which is especially important for those with declining vision. Gimbals are also a popular choice to illuminate artwork or to accent an ornate fireplace mantle that may hold pictures or other collectibles.
All experts agree that a customized layout should consider several factors, including the client’s activities, room color and materials, and, most importantly, the homeowner’s age. “As vision fades with age, a well-lit room is essential,” Walter says. “At 60 we need at least three times the amount of light we needed at age 20.” While 50 to 100 foot-candles are sufficient for most task lighting, at least 200 foot-candles may be required for seniors.
Any changes to a home’s plans, such as ceiling slope, height, or even cabinet and floor color are important to know so that lighting adjustments can be made. No one magic formula exists for the best layout of recessed cans. The more information you can learn from the homeowner about their furnishings and preferences, the more functional and practical the lighting design can be.
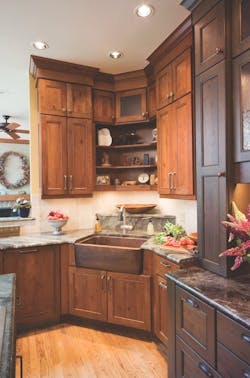
The original 1980s kitchen (below, right) relied on 6-inch cans over the walkways for task lighting and a fluorescent strip over cabinetry for indirect uplighting and to keep the space from being a lighting disaster. The new country-style kitchen (below, left) by Michael Collins Fine Homebuilding and Doug Walter Architects uses five separate lighting circuits: two for the cans for precise control; one for the undercabinet lighting; one for the pendants at the island; and one for the accent lights in the glass-front uppers to the right. All switches are dimmable. (Photo: below, left, Philip Wegner Photography)
About the Author
Elizabeth Mack
Elizabeth Mack is a freelance writer based in Nebraska.
