Drawer Boxes That Are ‘Good Enough’
Chris Salomone is an accomplished furniture maker, but when it comes to drawer boxes, he believes that “good enough” is ... well, good enough.
“In a way, woodworking is about picking your battles—at least if you want to get things done in a reasonable amount of time,” Salomone says. “You have to pick and choose the spots where you want to spend your time—the spots where you’re going to get the most bang for your buck. In my opinion, drawer boxes are not one of those spots.”
Although he has built plenty of fancy drawer boxes, when he’s building simple storage pieces, all that work doesn’t make sense. So that means no dovetail joints and no dadoes to catch the drawer bottom. Just square-cut plywood sides and bottoms that are glued, predrilled, and fastened with countersunk star-drive screws.
Cutting the Sides
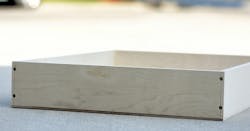
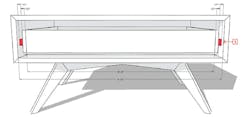
Salomone builds his drawers so that the front and back pieces fit between the side pieces instead of the other way around [1]. He’s betting that the star-drive screws he uses to fasten the sides can resist forces in shear better than forces in withdrawal.
“It just seems stronger,” he says. “It honestly probably doesn’t matter because I’m not putting a ton of weight in these things, and with ball-bearing slides, it doesn’t take a whole lot of force to get the drawer moving.”
Because he uses ½-inch plywood for the sides and each drawer slide requires a ½-inch clearance, Salomone determines the length of the front and back pieces simply by measuring the cabinet interior and subtracting 2 inches. The length of the side pieces depends on the cabinet depth. What matters is that they’re shorter than the cabinet depth, not longer. The width depends on how deep the drawer will be.
Drawer Bottoms
Salomone puts the bottom on the bottom. For lightweight drawers, applying the bottom of the drawer box directly to the underside is much faster than cutting dadoes in the sides, and the glued and screwed joints are plenty strong. It also increases the available space within the drawer.
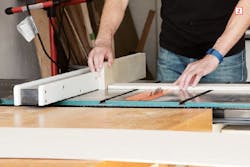
When setting the fence to cut the bottoms, Salomone doesn’t use a tape; he uses the drawer parts as story poles. To get the front-to-back dimension, he lays a side piece on the table and moves the fence until it bumps against the blade. For the side-to-side dimension, he does the same using a front or back piece, but he bumps one end against two side pieces placed vertically against the fence [2].
Assembly
To ensure that the drawer box is square, Salomone uses the drawer bottom as a template for fastening the sides, front, and back pieces. He begins by spreading glue on one edge of one side piece and placing its length flush with the edge of the bottom. The ends should also be flush because the side piece was used as a gauge to cut the bottom.
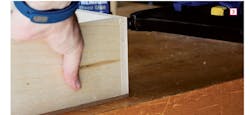
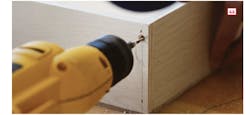
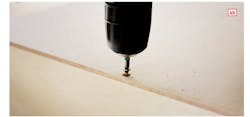
Working his way around the drawer bottom, he glues the back piece in place, then the other side, and finally the front piece, then pins everything in place with brads [3]. Next, he predrills countersunk pilot holes [4a] and fastens everything together with star-drive wood screws [4b].
“Some things are about artistry, finessing angles and details to get them as clean and perfect as possible,” Salomone says. “But other things, just aren’t ... Time has value. It’s a currency more limited than any other currency. Pick your battles and spend less time on certain aspects of a build so that you can spend more time in other areas ... Because as we all know, time is money.”
