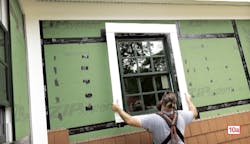
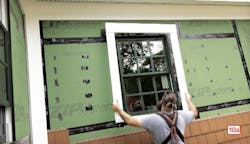
Production Exterior Trim
We use production techniques to preassemble exterior trim on the workbench. All but four of the 13 windows on this particular project are the same size, so we’re mainly dealing with one set of dimensions. The one-offs and doors will also benefit from workbench assembly, but the real gains in efficiency will be in the nine windows that are identical. Here’s how it works.
[1] Cut all pieces to size. To make sure each set of parts is cut to the same length, I clamp a stop block to the table of the sliding miter saw, make the cuts, then stack pieces in piles on the workbench, sorted by length. Next, I rip the head and sill pieces to width. This means resetting the table saw fence twice: once for the sill and once for the built-up 1 ½-inch head casing we’re fabricating by gluing together 5/4- and ½-inch PVC trim stock. Along with full-width 1x4 Kleer PVC side casings, that makes for four separate piles of parts for the nine identical windows.
[2] Glue the head casings. For the built-up head casing, I choose the cleanest face of the 5/4 stock to face the street, then spread two-part PVC cement on the other side. After flushing up the edges with a matching piece of ½-inch PVC, I use a pin nailer from the backside to fasten the two together while the adhesive sets up.
[3] Route the rabbet. The Kleer PVC trim has a pre-milled rabbet on one edge to hide the ends of the vinyl siding. To duplicate this on the sills and head casings, I set up a matching cutter on the router table and run everything through at the same setting.
[4] Prep the joints for dominoes. The butt joints will be reinforced with dominoes cut from scraps of the same material, with the edges routed using a roundover bit and cut to length. I cut two slots per joint in all of the parts at the same time to make sure they’re consistent, then restack everything on the workbench, ready for assembly.
[5] Predrill for pocket screws. To hold the joints together while the glue dries, I predrill pilot holes for the pocket screws, one screw per joint. When all of the pilot holes are drilled, we’re ready for glue-up.
[6a] [6b] Glue the joints. Working with one window at a time, I roughly position one sill, one head casing, and two side casings on the workbench, squeeze Kleer’s two-part PVC adhesive into each domino slot, and slide in the dominoes.
[7a] [7b] Assemble the trim. With everything properly aligned, I can pull the joints together by hand, then clamp them permanently with pocket screws. For larger windows, I would set a stop block at one end and push each piece in succession onto the corresponding set of dominoes.
[8] Clean up the squeeze-out. Some glue usually squeezes out, but it can easily be removed with a scrap of cardboard before the adhesive hardens.
[9] Stack the trim. I stack completed trim assemblies by size, which makes it easy to match them up to the corresponding windows.
[10a] [10b] Outside is where the efficiency of preassembly really pays off. Because the trim assemblies are uniform, they’re interchangeable for any window of the same size. Installation is a simple matter of sliding the trim over the window jamb and fastening with Cortex screws every 12 to 16 inches. I use an 8d nail to gap the trim from the window jamb: two nails at the top for the trim to sit on and one on either side near the bottom to center the trim.


