flexiblefullpage
interstitial1
Currently Reading

How to Install Fiber-cement Panels

Advertisement
billboard
Home Improvement

How to Install Fiber-cement Panels

A system of tracks holds large panels off the sheathing, creating a rainscreen while also providing flashing at joints and a finished edge treatment  


By By David Joyce October 8, 2018
This article first appeared in the October 2018 issue of Pro Remodeler.

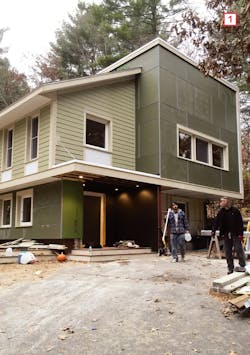
As part of an energy retrofit, we transformed a 1970s raised ranch into a zero-energy home with rainscreen siding (“How to Install Exterior Rigid Foam" [Part I & Part II]). In addition to lap siding, we used large fiber- cement panels along the lower half of the front elevation and on the large bump-out we added to the north gable of the house [1].

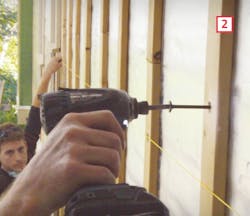
On most walls, we attached the siding to furring strips, which also served to hold in place the 4 inches of rigid foam we added to the outside of the walls. Because foam compresses, before installing the siding, we used a string line to ensure the furring strips were in plane [2]. This was especially important with the large fiber-cement panels, which are less flexible than lap siding.

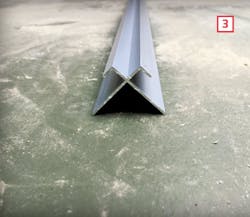
The 4-foot-wide panels are factory-painted and mounted to a system of aluminum tracks fastened to the wall. The track, which is also factory-painted, is a geometric part of the panel design. Components include outside corners [3], inside corners, vertical butt joints, J-channel, and a Z-channel that allows for drainage at horizontal joints.

On the retrofitted sections of the house, we mounted the track to furring strips [4] but the more typical installation is directly over sheathing. That was the case on this house at the bump-out, which was new construction built using ZIP System sheathing instead of rigid foam and furring strips. 

Step by Step

Here’s a step-by-step look at how we installed the panels on that gable bump-out. In these photos, the panels have been cut along the bottom to follow the slope of a roof below where it meets the wall.

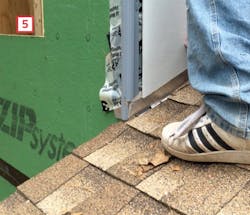
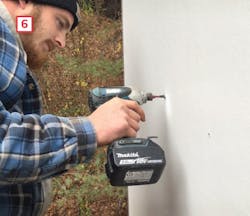
• We began with a single piece of outside corner track fastened vertically to the wall sheathing. The track spaces the siding panels off the wall sheathing about 1/8 inch, which creates a capillary break behind the siding. (In other parts of the building, we used J-channel where the fiber-cement was butted against a trim board.) We slid the long edge of the first panel into the track [5], made sure it was properly positioned up off the roof, and screwed it in place through pre-drilled holes [6].

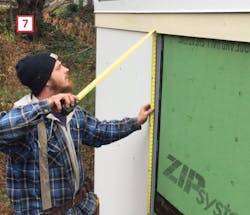
• To prepare for the next panel, we slid a piece of track over the other vertical edge and fastened it to the sheathing. To get the long-point dimension, we measured the in-place panel [7], then added ½ inch because the tops of the panels tuck under a fascia that rims the top of the bump-out. We got the short-point dimension by measuring to a vertical line snapped 4 feet away. 

• At the cut station on the ground, we cut the panel to size and pre-drilled for fasteners. Because the roundhead stainless steel fasteners were designed to be visible, we laid
out the fasteners on a grid to ensure they would be regularly spaced and visually aligned.

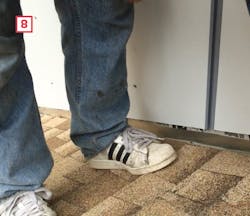
• Back at the wall, the crew tucked the top of the panel under the fascia, then slid the long edge into the track against the in-place panel. The final step before fastening was to lift the panel until the bottom edge was flush with the in-place panel [8].

• This section of wall had just one course of paneling, but the process was the same for successive courses on other parts of the building. Depending on the configuration, we used Z-track for horizontal joints, and J-track at corners where the fiber-cement panels terminated at trim boards.

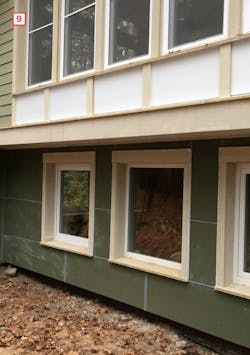
Although panels can be installed on a 4-foot module, on this project we located horizontal and vertical joints to create a geometric pattern oriented around the position of the windows [9]

Get more Jobsite Know-How here


written by

David Joyce

David Joyce owns Synergy Construction in Lancaster, Mass. This article is adapted from a video at ProTradeCraft.com. Thanks to David and his crew for  allowing us to hang out at their jobsite.


Add new comment

Plain text

  • No HTML tags allowed.
  • Web page addresses and email addresses turn into links automatically.
  • Lines and paragraphs break automatically.
leaderboard2

Related Stories

Brian Gottlieb Receives Remodeling Mastery Award

Presented by industry icon, Mark Richardson, the award celebrated Gottlieb’s extraordinary impact on remodeling

What's Beyond the Hammer?

Working with Brian Gottlieb on the book Beyond the Hammer provided a masterclass on how to build an aligned team 

5 Counterintuitive Strategies to Improve Your Business

Follow these strategies to inspire employees, instill trust, and beat the competition

Couple Act As Much More Than General Contractors

How LBR Partners uplifts and educates their Spanish-speaking trade partners

How to Correctly Hire for Business Growth

Refloor CEO Brian Elias shares exactly how his company hires the correct people for the correct seats

Power Home Remodeling Expands Financing Offshoot with $400M from Goldman Sachs

Industry-leading home improvement company Power plans to grow its fintech offshoot fivefold with new investment

·

Increase sales and grow your business with Momnt Contractor Financing

Give your clients simple, fast, and affordable payment options for the investments that matter most

Great Day Improvements Acquires LeafGuard and Englert

Leading home improvement company Great Day Improvements purchases two major brands from private equity firm Audax

Latest Private Equity Activity Signals Continued Strength in Home Improvement

A hot month for private equity means the industry remains opportunity-rich

Josh Sparks: To Infinity (Exteriors) and Beyond

A roofer-turned-CEO who’s succeeding in his mission of up-leveling the industry

Advertisement
boombox2
Advertisement
halfpage2
Advertisement
native1

More in Category


Advertisement
native2
Advertisement
halfpage1
Advertisement
leaderboard1