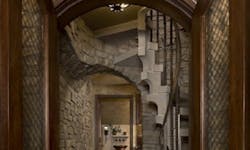
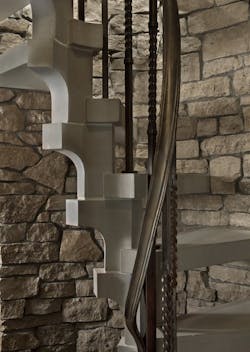
In our Design Awards issue (Sep/2016), we highlighted a platinum-award winning project in the Residential Specialty category. The clients wanted to expand their basement wine and cigar storage area by creating the atmosphere of a rustic Italian cellar. Access would be via a milled limestone spiral stair, but with one caveat—and it was a doozy: The clients didn’t want a central column, which they thought would look too heavy.
We talked with just about everyone involved with the project to find out how it all came together. Here’s what we learned.
Rising Against Gravity
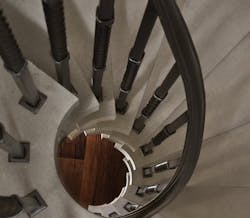
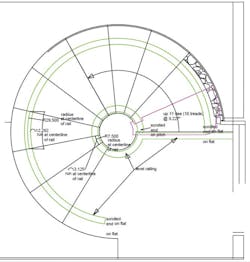
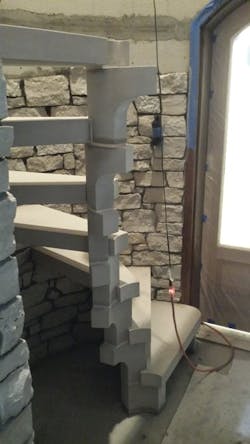
The stack of 3-inch-thick milled limestone risers follows a tight radius at the center of a roughly 6-foot-diameter circle.
Each riser rests on the one below, transferring the load from the treads downward at a slight angle. Although the upper risers appear to be floating in space, a solid steel platform supporting a limestone landing at the top, plus the weight of the treads and their integration into the stone veneer wall, all work together to stabilize the structure.
All of the wedge-shape treads are 3 inches thick, with the ends cut to match the inner and outer radius of the stairwell. Nine of the 10 treads are just shy of 29 inches long; the exception is the bottom tread, which is about 2 inches longer to enable a rounded corner return at a basement doorway transition. All of the treads are notched at the narrow end to accept the riser blocks.
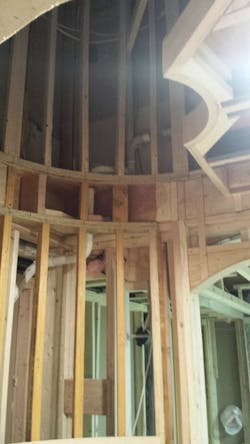
Each stone tread weighs about 65 pounds and is supported by a steel angle iron bracket fastened to the stairwell wall framing. The plan called for a minimum of two studs per tread.
At the first-floor level, the surround was framed with dimensional lumber, but owner Eugene Haske switched to engineered lumber at the basement level to ensure a flat, uniform curve and a stable structure that won’t sag or shift.
Step by Step
Stonemason Giuseppe Notarianni figured out a stair assembly sequence that required working tread by tread, applying stone veneer in stages both to provide structural support at the perimeter and to lock each tread into the wall.
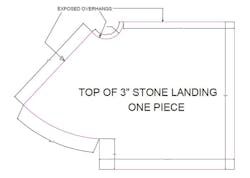
Upper landing. Notarianni’s first challenge was setting a large limestone landing at the top of the stair. To ensure perfect positioning, he leveled and fastened a series of small shims to the subfloor, built a makeshift track using scrap 2-bys, and dropped dollops of mortar between the shims.
It took four men standing adjacent to the landing and on scaffolding in the stairwell to roll the stone on wooden dowels into rough position, then slightly lift it to remove the 2-bys, and slowly lower it again onto the mounds of mortar. Notarianni then used a mortar bag to fill the open spaces under the stone from underneath through 1-inch holes he’d drilled earlier in the subfloor.
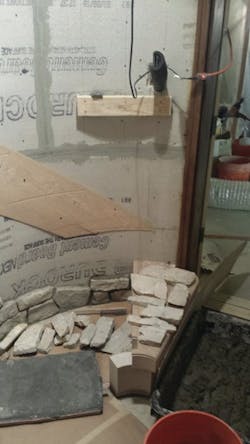
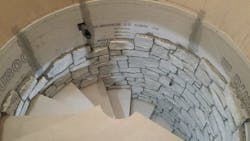
Stairwell. The wall is sheathed on both floors with two layers of ¼-inch plywood, glued and screwed. Before setting any of the treads, Notarianni glued and screwed a layer of ½-inch Durock cement board as a backer for the split-face stone veneer. To prebend the rigid backerboard, he laid multiple sheets over a barrel-shape structure and let gravity do the work. He glued the entire surface of the plywood sheathing and used pole clamps to press and hold the Durock in position while he screwed it to both the studs and the sheathing.
Watch that first step. Notarianni spent most of a day ensuring that the first tread was in the proper position. Unlike the other treads, it’s supported at both ends by curved stone riser blocks epoxied over stainless steel pins to the concrete floor. There isn’t a lot of wiggle room with milled stone, and Notarianni knew he needed a perfect start to ensure the stair went together as planned.
Although all of the stone had been milled using a CNC machine, the treads vary slightly in thickness. To help guide the layout, Notarianni asked Northern Staircase Co. to provide a template, which they made using ¼-inch-thick poplar on which they CNC-stenciled the full outline of all treads and risers.
The wide end of each remaining tread is supported by a short piece of 2 x 2 x ¼-inch angle iron. Starting at the bottom and working one tread at a time, Notarianni marked the location of each tread, then cut away the corresponding portion of the stringer template and fastened the angle iron with ½-inch lag screws through the sheathing and halfway into the studs.
The treads rest on the angle iron and are mechanically tied back to the studs with heavy-gauge copper wire recessed into the tread surface. Ninety-degree bends at either end of the wire are epoxied into holes drilled in the top of each tread, and a loop in the wire is attached to the framing. The copper is completely hidden by the stone veneer.
The angle iron provides temporary support for the wedge-shape treads that behave like keystones and are both supported and held to the wall by the stone veneer, which was progressively installed and grouted as each step was put in place.
Because of the slight variation in tread thickness, the risers, which are connected to one another by stainless steel pins, could not be dry-laid. Instead, Notarianni plumbed and leveled each riser to match the tread layout, then grouted the joint with white mortar to match the stone.
After setting a tread in place and installing the stone, the process started over: level and shim the next riser, drill for pins, epoxy it in place, then let it cure while fastening the angle iron for the next tread. After setting the landing and the bottom tread, two men were able to set one tread per day, on average, including the accompanying stone veneer.
Finishing Touch
Brian Cook, of Cook’s Iron Art, in Willis, Mich., fabricated and installed the forged steel railing.
The joint is concealed by a decorative square collar caulked to the tread to keep it from rattling. Cook prebent the forged steel railing in his shop, hand-hammered it on site to match the curve of the stairs, and welded it in place to the cast iron balusters.
A Team Effort
CBI Design Professionals: In-house engineer, Martin A. Klein, PE, provided initial structural specs for the modular stair. CAD operator Brandon Hartwick built an early 3-D SketchUp model.
Haske Home Services: Owner Eugene Haske coordinated the overall project, including the masonry subcontractor, stair consultant, stone supplier, and railing sub.
Stone Expressions: Owner Giuseppe Notarianni subcontracted the stair and all of the stonework. Pat Donovan, president of Northern Staircase Co., consulted and produced CAD drawings used by Genessee Cut Stone & Marble Co. to mill the limestone. Brian Cook of Cook’s Iron Art fabricated and installed the railing.
About the Author
Sal Alfano
Executive Editor
Sal Alfano is executive editor for Professional Remodeler. [email protected], 202.365.9070
