

Roofs in high-wind areas are most vulnerable at the edges. Even if the shingles stay on the roof, wind can drive rain underneath the roofing and underlayment, and from there the water makes its way into the house at seams in the roof sheathing.
Taking steps to prevent this kind of damage begins with roof design. Hip roofs suffer less wind damage than gable roofs. Wind can push against a gable like it is a sail, and if there are gaps in the envelope’s air seal, it can pressurize the attic and blow the roof off from the inside. Hip roofs are better at deflecting high winds up and over, reducing the risk of wind damage.
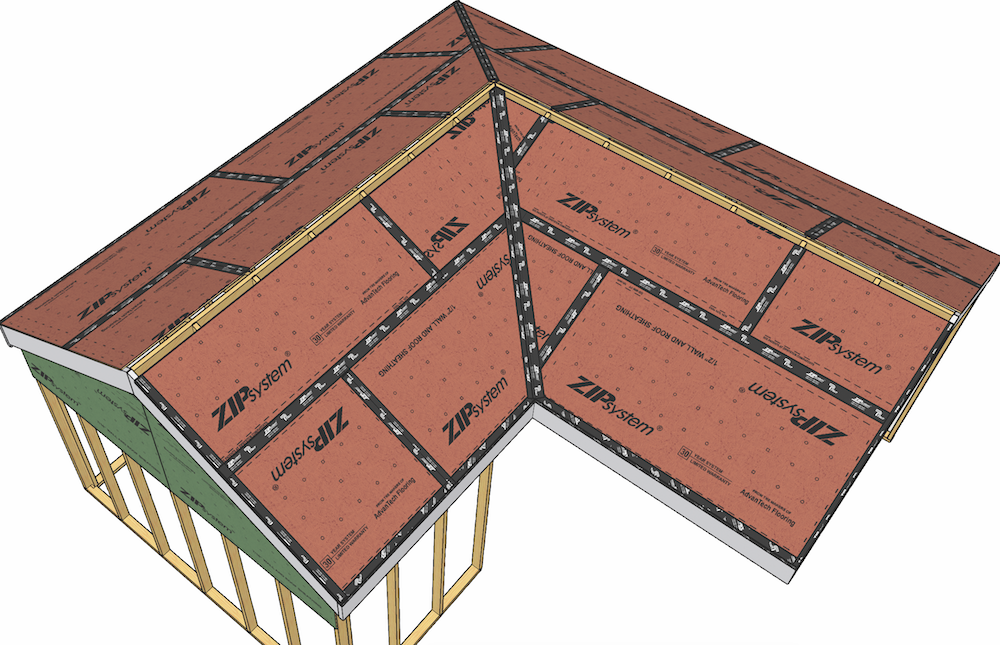
Regardless of roof design, however, if roofing blows off during a storm, it’s important that the roof deck itself will remain watertight. Here’s a step-by-step description of how to install metal flashing, sealing tape, and peel-and-stick membranes to prevent roof leaks, especially in high-wind areas.
Edges and Seams
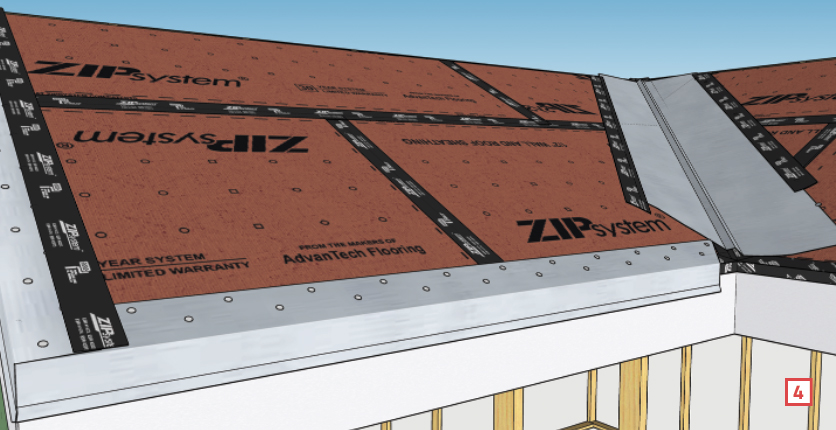
Start by sealing the perimeter of the roof deck and all seams between sheathing panels. To ensure proper overlaps, begin at the eaves and work toward the ridge (see “Get the Sequence Right").
Metal Drip Edge
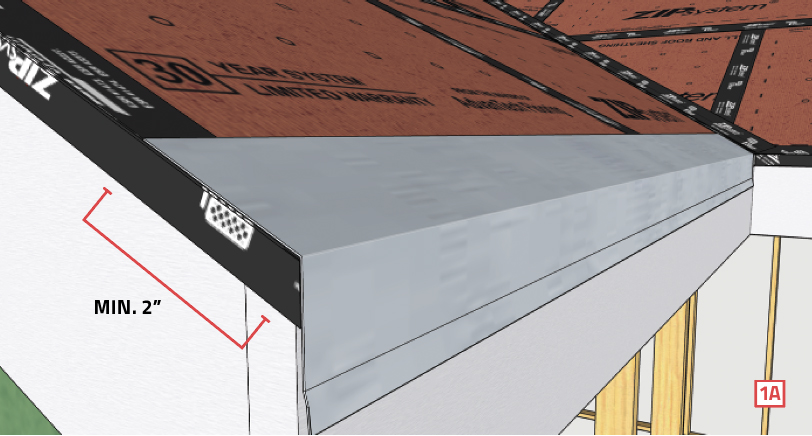
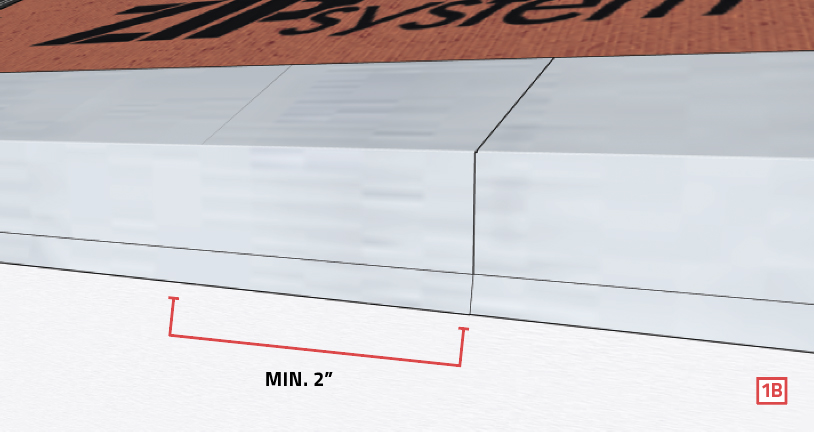
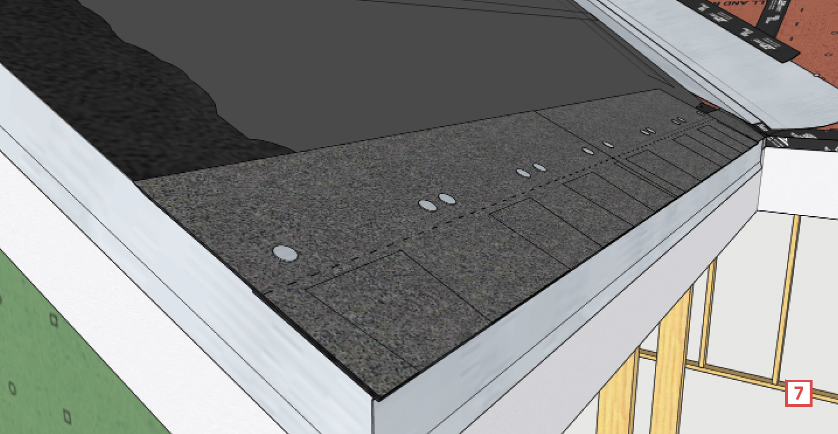
Next, install metal drip edge over the taped eaves. The uphill leg should extend at least 2 inches up the roof (more is better) [1A]. For long runs, overlap seams in the drip edge at least 2 inches to meet code, and at least 3 inches for the FORTIFIED Home program [1B]. Start at the end opposite the direction of prevailing winds so that wind-driven rain will drain away from the seam.
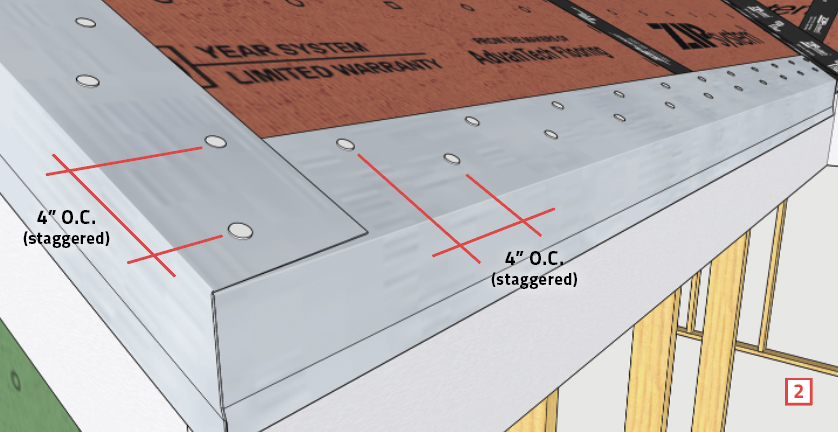
At the rake, the lowest piece of drip edge should overlap the eave drip edge [2]. As with seams in eave flashing, seams in rake flashing should overlap by at least 3 inches to comply with FORTIFIED Home requirements. Nail all drip edge every 4 inches in a staggered pattern.
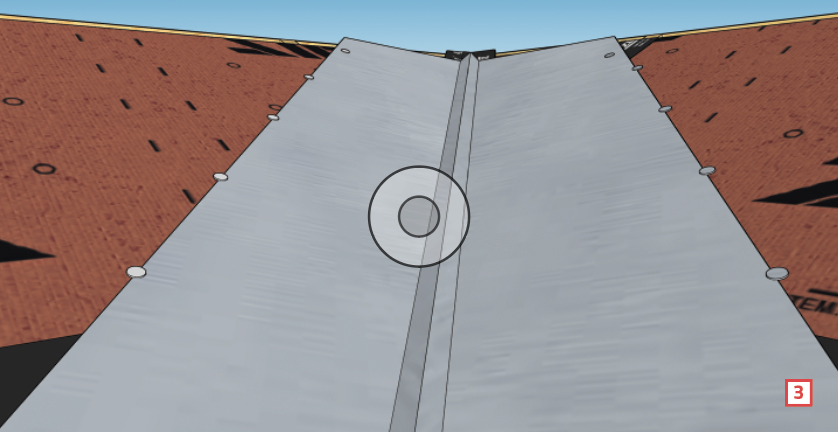
Valley Flashing
Lay metal valley flashing over the sealed valley, nailing through the metal only at the top [3]. At the edges, trap the metal against the sheathing under the heads of roofing nails. This will allow for movement with daily expansion and contraction cycles. Extra bends in valley flashing to create a “W’ shape also allow for expansion and contraction and can prevent overwash.
Tape the edges of the valley metal [4]. Optionally, you can also seal the drip edge to the sheathing at the rakes and eaves.
Shingle Starter Strip
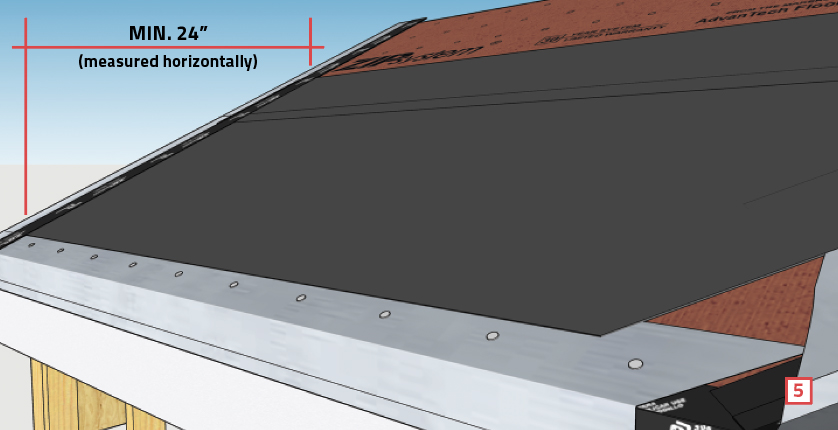
Eaves need extra protection from water and ice for at least 2 feet, measured horizontally from the exterior wall toward conditioned interior space [5]. Depending on roof pitch, that usually requires using more than one strip of peel-and-stick membrane. To save on material, the second strip can be a half-width cut from a full roll.
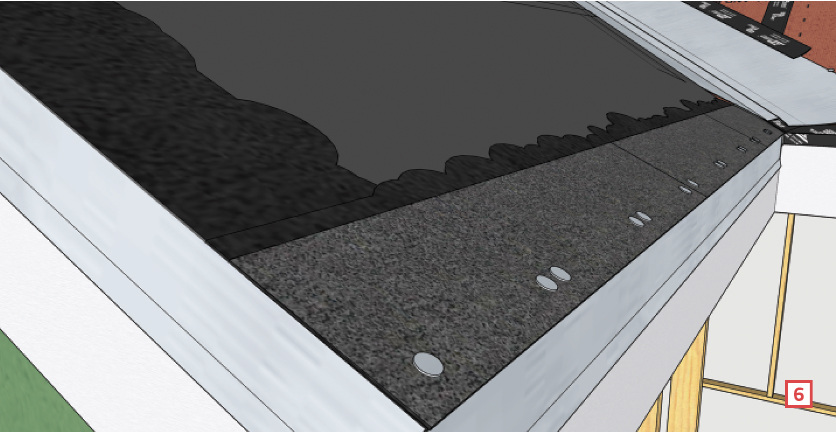
Embed starter strip shingles in an 8-inch band of roofing cement at the eaves [6]. Use a double “storm-nail” pattern, nailing within 2 inches of the bottom of the shingles.
Storm-nail the first course of shingles following manufacturer instructions [7]. Extend the bed of roofing cement all the way up the rake to add extra protection at edge shingles.
Get more Jobsite Know-How here
Adapted from “Storm Proof Roof 2: Edge Flashing and Starter Strip,” one in a series of videos and animations about stormproof roofs produced by ProTradeCraft.com. Illustrations are taken from an edited version of a 3D roof flashing SketchUp Warehouse model built by Ben Richardson of Huber Engineered Woods, Inc. Thanks also to Mike Guertin for technical assistance.
— For more information, see the “Fortified Re-Roofing Checklist”
Add new comment
Related Stories
 receives Remodeling Mastery Award from Mark Richardson at the 2024 Pinnacle Experience")
Brian Gottlieb Receives Remodeling Mastery Award
Presented by industry icon, Mark Richardson, the award celebrated Gottlieb’s extraordinary impact on remodeling

What's Beyond the Hammer?
Working with Brian Gottlieb on the book Beyond the Hammer provided a masterclass on how to build an aligned team

5 Counterintuitive Strategies to Improve Your Business
Follow these strategies to inspire employees, instill trust, and beat the competition

Couple Act As Much More Than General Contractors
How LBR Partners uplifts and educates their Spanish-speaking trade partners

How to Correctly Hire for Business Growth
Refloor CEO Brian Elias shares exactly how his company hires the correct people for the correct seats

Power Home Remodeling Expands Financing Offshoot with $400M from Goldman Sachs
Industry-leading home improvement company Power plans to grow its fintech offshoot fivefold with new investment

· sponsored
Increase sales and grow your business with Momnt Contractor Financing
Give your clients simple, fast, and affordable payment options for the investments that matter most

Great Day Improvements Acquires LeafGuard and Englert
Leading home improvement company Great Day Improvements purchases two major brands from private equity firm Audax

Latest Private Equity Activity Signals Continued Strength in Home Improvement
A hot month for private equity means the industry remains opportunity-rich

Josh Sparks: To Infinity (Exteriors) and Beyond
A roofer-turned-CEO who’s succeeding in his mission of up-leveling the industry