Photos, from video: courtesy Mark IV Builders
Hanging cabinets is easy. The tricky part is scoping out the room to make sure everything fits and compensating for floors and walls that aren’t always square, level, or plumb. Follow these six tips, and you’ll avoid those “gotcha” moments.
Tip 1: Find the High Spot
In older homes, very few kitchen floors are perfectly flat and level. We can make up for minor imperfections by shimming base cabinets up or cutting the toekick down. Shimming is easier than cutting, so the first step in laying out the cabinets is to find the high spots.
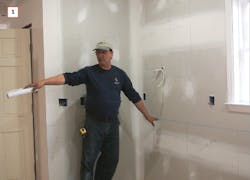
We use a laser level and a tape measure to shoot elevations against walls that will receive base cabinets. Once we find the high spot, we measure up and make a mark to show where the top of the base cabinets will fall, which is usually 34½ inches off the high spot on the finished floor. From that mark, we snap a level line on the drywall around the room to mark the top of the base cabinets [1].
We double-check the location of the dishwasher, range, and any other undercounter appliances to make sure we can adjust their height within the range of the built-in adjustable feet. If there’s a hump or drop of more than about ½ inch in one of these locations, we may split the difference. In that case, we would cut the cabinets down at the high spot and shim them up at the low spots.
Kitchen floors in older homes are rarely perfectly flat and level, so cabinet layout begins with using a laser and tape measure to find the high spot. A level line snapped on the drywall marks the top of the base cabinets.
Tip 2: Start at the Corners
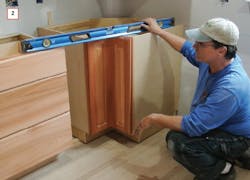
We mark the base cabinet locations on the wall to make sure everything fits and properly aligns. If there is a sink cabinet that has to center on a window, we lay that out first; otherwise, we start at the corners and work toward the middle. We use filler strips in the middle of the run to make up for any spacing adjustments. We also use fillers at base and wall end cabinets to make up for irregularities and any slight out-of-plumb condition [2].
If the corners are out of square, or if either of the end walls is not plumb, we will need to adjust the location of the base cabinets. A corner that’s only slightly greater than 90 degrees usually means we can put the back of the corner cabinet up against one wall—usually the longer wall—and make up for the out-of-square condition at the back of the countertop on the short run of cabinets. If the corner angle is slightly less than 90 degrees—or if the end wall is leaning in at the top—we will still try to place the back of the cabinet against the long wall, but we’ll need to hold it in from the short wall enough to make sure the wall cabinets align with the base cabinets on the long wall and that the cabinet fronts on the short wall can be aligned without having to shave the drywall.
Tip 3: Measure from the top down for uppers
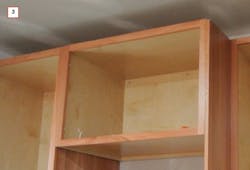
If the cabinet system includes a tall cabinet or a full-height panel, we use that to set the height of the wall cabinets [3]. We will measure up from the high spot on the floor and snap a level line where the top of the tall cabinet will fall, then measure down the height of the wall cabinets and snap another line. These two lines establish the top and bottom of the wall cabinets.
In a kitchen with a 96-inch-tall full-height cabinet, for example, our upper line will be 96 inches off the high spot. We’ll measure down 42 inches to locate the bottoms of most of the wall cabinets (less for shorter wall cabinets over the range and fridge). This leaves 19½ inches for a countertop and the code-required 18-inch backsplash, plus a little wiggle room.
Tip 4: Minimize drywall repairs
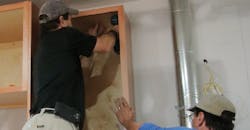
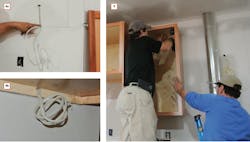
Before the drywall goes up, we mark the locations of any wiring rough-ins for undercabinet lighting. If these stub-outs are too low, it could mean having to patch the drywall later. Instead of trying to locate these precisely, we mark them an inch or two high. That way, when it comes time to hang the wall cabinets, we can cut a small slot in the drywall so we can slide the wire down until it perfectly aligns with the hole in the cabinet mounting rail [4a & 4b].
[4a, 4b] To avoid drywall patches, locate rough wiring higher than needed, then slide the wire along a slot in the drywall until it reaches the opening in the cabinet rail.
[5] Hanging wall cabinets before uppers makes lifting and holding cabinets in place easier and reduces the chance of damaging base cabinets during installation.
Tip 5: Hang the uppers first
We always hang wall cabinets first because we can get our step ladders under the work, which makes it easier to lift and hold cabinets in place during alignment and fastening [5, above]. Not having to reach over the base cabinets also means there is less chance we will scratch the finish or otherwise damage them.
Tip 6: Start plumb and stay that way
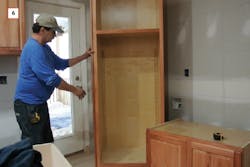
Cabinets are always installed level and plumb, so when walls are out-of-plumb, there will be gaps. Accurate layout allows space to fasten a filler strip that has been scribed to match irregularities in the wall to the edge of the cabinet facing [6]. This also works where the backs of finished end panels meet out-of-plumb walls.
Where cabinets meet an out-of-plumb end wall, scribe a filler strip to match irregularities in the wall and fasten it to the edge of the cabinet facing.
---
Jim Yingling is a superintendent for Mark IV Builders, in Cabin John, Md.
To see a video of these installation pointers, go to “6 Kitchen Cabinet Layout Tips” at ProTradeCRaft.com.
